
To create DIY steampunk wall art with gears, start by gathering upcycled mechanical parts like old gears, clock faces, keys, and vintage knobs. Arrange and secure them on your wall, mixing metals, woods, and plastics for layered texture and visual interest. Play with asymmetry and vintage touches for authenticity. Mount everything securely and step back to adjust for balance. If you want to explore more creative ideas and techniques, keep exploring these tips for a stunning industrial display.
Key Takeaways
- Collect upcycled gears, clock parts, vintage decor, and mixed materials like metal, wood, and plastic for layered textures.
- Plan your design by sketching or arranging items on the wall, balancing asymmetry and visual interest.
- Attach pieces securely using strong adhesive, nails, or hooks, ensuring a durable, cohesive composition.
- Incorporate vintage elements like keys and watch parts to add authenticity and storytelling to your artwork.
- Finalize by assessing the overall balance, adding focal points, and mounting on neutral or textured backgrounds for impact.

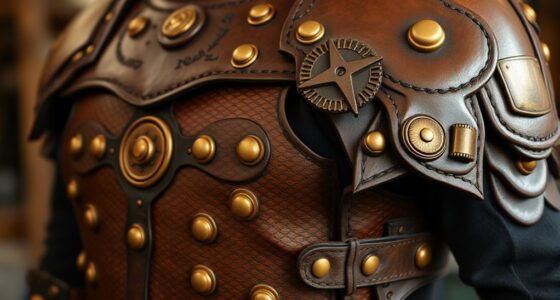
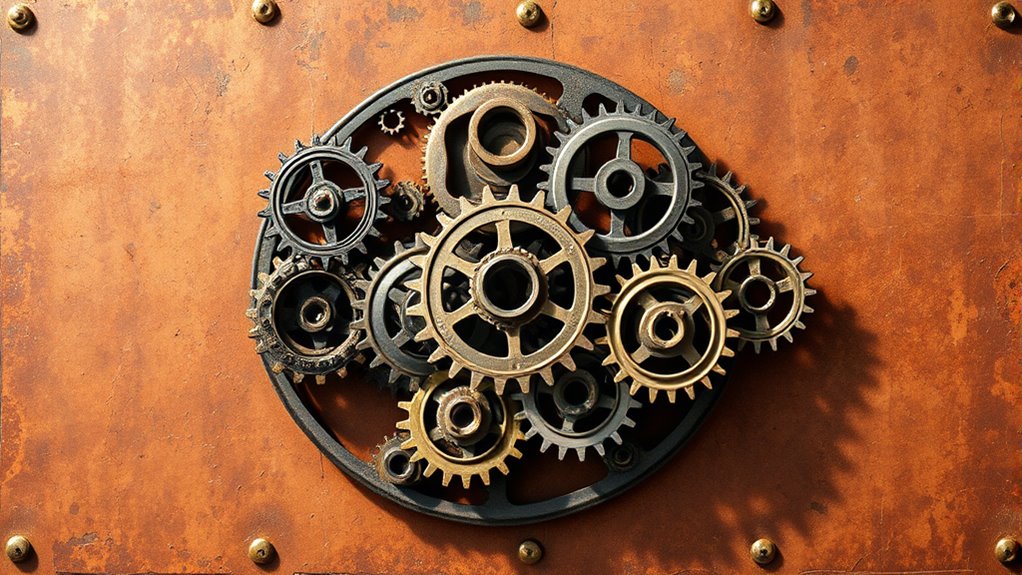
Ever wondered how to transform your space with a touch of industrial elegance? Creating DIY steampunk wall art with gears is the perfect way to bring that gritty, vintage vibe into your home. The key to achieving an authentic steampunk look lies in your choice of materials. Upcycling materials is not only eco-friendly but also adds character to your artwork. Think old machinery parts, discarded clock faces, or vintage decor items you might find at thrift stores or flea markets. These pieces carry history and charm, giving your wall art a unique, storied quality. Incorporating vintage decor elements into your design enhances the steampunk aesthetic, making your piece stand out with authentic detail.
Transform your space with upcycled gears and vintage decor for authentic steampunk wall art.
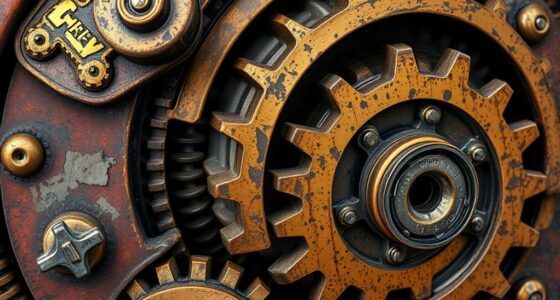
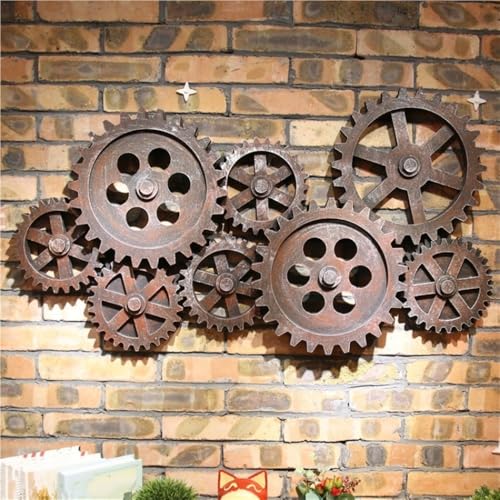
Start by gathering your materials, focusing on upcycling items that can be repurposed into gears and mechanical components. Look for old metal gears, cogs, and sprockets that have a rugged, industrial appearance. You might also find clock parts or vintage knobs that can be integrated into your design. Once you’ve collected enough pieces, plan your layout. Visualize how the gears will interlock or overlap to create a cohesive, mechanical look. You can sketch your design or simply lay the items out on the wall to see how they fit and balance each other.
When attaching the gears, use strong adhesive or small nails, depending on the weight and size of your pieces. For a more polished look, consider painting some parts with metallic or rusty tones, but leave others in their original vintage finish for contrast. This variation in textures and colors enhances the depth and realism of your steampunk art. Don’t shy away from mixing materials—metal, wood, and even plastic can work together to create a layered, textured masterpiece. Adding small vintage decor pieces like old keys, watch parts, or decorative screws can also contribute to the overall industrial aesthetic.
Mounting your gear collage on a neutral-colored wall makes the details pop, but you can also experiment with darker or textured backgrounds for a more dramatic effect. As you assemble, keep in mind that asymmetry can add visual interest, characteristic of steampunk design. Once complete, step back and admire your creation—a stunning piece of wall art that combines upcycling, vintage decor, and your creative vision. This DIY project not only personalizes your space but also tells a story of craftsmanship and reclaimed beauty. With a little effort and imagination, you craft an eye-catching, industrial-inspired piece that’s sure to be a conversation starter.

Hello Artwork 4 Panel Canvas Wall Art Mechanical Gear Cogs Old Factory Painting Engineer Team Motivation Inspiration Pictures Print For Modern Home Decor Stretched and Framed Ready to Hang 48x32inch
Size: 12''x24''x2pcs+12''x32''x2pcs (Total size of 4 pieces if placed together without spaces is 48''x32'')
As an affiliate, we earn on qualifying purchases.
As an affiliate, we earn on qualifying purchases.
Frequently Asked Questions
What Are the Best Materials for Creating Steampunk Gear Wall Art?
You should choose metal finishes like brass, copper, or aged steel to give your steampunk gear wall art an authentic look. Use a variety of gear sizes to add visual interest and depth. Recycled metal, watch parts, and machine gears work well for a textured, industrial feel. Combining different finishes with assorted sizes helps create a dynamic, eye-catching piece that truly embodies the steampunk aesthetic.
How Can I Customize Gears for a Unique Steampunk Look?
Imagine a time-traveling artist—now, you can be one too! To customize gears for a unique steampunk look, start with gear embellishments like rivets or clock parts. Use custom paint to add metallic shades, rust effects, or intricate patterns. Mix different sizes and textures, then layer them creatively. This personal touch transforms your wall art into a one-of-a-kind piece that truly reflects your steampunk vision.
What Safety Precautions Should I Take When Working With Metal Parts?
When working with metal parts, you should always wear protective gear like safety glasses and gloves to prevent injuries. Focus on tool safety by handling sharp tools carefully and keeping your workspace organized to avoid accidents. Make certain you follow manufacturer instructions for power tools, and never rush your projects. Taking these precautions helps protect you from cuts, burns, and other hazards, making your steampunk art safe and enjoyable to create.
How Do I Ensure My Wall Art Stays Securely Mounted?
To keep your wall art securely mounted, use proper wall mounting techniques like heavy-duty hooks or anchors suited for your wall type. Consider gear adhesive options such as industrial-strength epoxy or strong adhesive strips for added stability. Make sure to clean the wall and gear surfaces before mounting, and press firmly to ensure good adhesion. Regularly check the stability to prevent any accidental falls or damage.
Can I Incorporate LED Lighting Into My Steampunk Gear Design?
You can definitely incorporate LED lighting into your steampunk gear design, and it’s a perfect coincidence if you’re already wiring your gears. Start by using LED strips or small bulbs for seamless LED integration, ensuring wiring safety by using proper connectors and insulated wiring. Carefully plan your layout to hide wires and switches, creating a polished look. This approach elevates your artwork with a striking, luminous effect that complements your steampunk aesthetic.

LARTSFRO Vintage Steampunk Wall Art Decor Posters Prints, Punk Room Bedroom Bathroom Dorm Wall Art Decor, Vintage Industrial Train Clock Hat Ship Posters Wall Decor for Home Office Man Cave Decor, 10×8 Inch Set of 4 Pcs Pictures (UNFRAMED)
【WALL ART SET】: Includes 4 packs wall art prints, each art print measures 8 x 10inch, large size…
As an affiliate, we earn on qualifying purchases.
As an affiliate, we earn on qualifying purchases.
Conclusion
Now that you’ve crafted your own steampunk wall art with gears, imagine how it transforms your space into a vintage-futuristic haven. Isn’t it amazing how a few parts can turn into a stunning focal point? With your creativity and a little effort, you’ve brought a unique piece of art to life. So, why not hang it up and enjoy the steampunk charm it adds to your home? The coolest decor is just a gear away!
Vintage Industrial Gear Wall Decor, Large Gear Accent Wall Panels for Room Decor, Wooden Abstract Wall Art, Rustic Steampunk Wall Decor for Bar, Garage or Home Office(Metallic)
Premium Wooden Gear Art Panels for Accent Walls: Crafted from high-density engineered wood, these Large Wooden Gear Art…
As an affiliate, we earn on qualifying purchases.
As an affiliate, we earn on qualifying purchases.
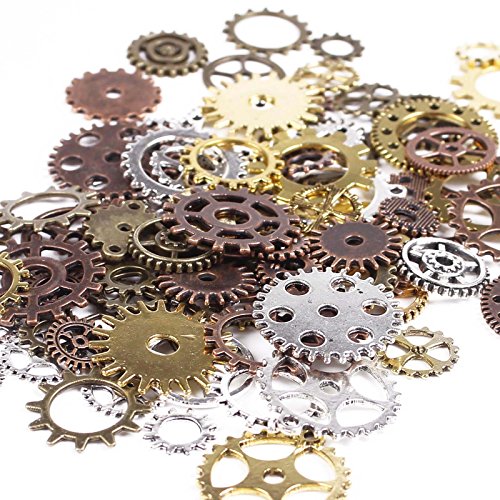
BIHRTC 100 Gram DIY Assorted Color Antique Metal Steampunk Gears Charms Pendant Clock Watch Wheel Gear for Crafting, Jewelry Making Accessory
Sold in "Gram", 100g includes around 80pcs antique gears(quantity may vary due to different sized gear but weight…
As an affiliate, we earn on qualifying purchases.
As an affiliate, we earn on qualifying purchases.