
To craft a steampunk compass prop, start by preparing a weathered base using aged wood or metal, then arrange vintage-style gears and clock parts for an intricate, mechanical look. Create a functional-looking needle from thin wire, mounting it on a pivot at the center, and protect it with a clear cover. Add Victorian-inspired accents like rivets and ornate details, then finish with metallic paints to achieve an authentic, aged appearance. Continuously, you’ll uncover more tips to perfect your design.

Get art and craft supplies delivered free with Prime
- Fast, free delivery on millions of items
- Prime Video, Amazon Music and more included
- Member-only deals all year
Key Takeaways
- Use a weathered wooden or metal disk as the base, then securely attach vintage gears and clock parts for a mechanical look.
- Craft a movable compass needle from a thin metal rod or wire, mounted on a pivot at the center of the prop.
- Add a clear cover over the face to mimic vintage instruments, ensuring the needle moves freely for realism.
- Incorporate decorative steampunk elements like rivets, ornate accents, and Victorian motifs around the perimeter.
- Finish with metallic paints in brass or copper tones, weathered with washes or dry brushing to achieve an aged, vintage effect.

Have you ever wanted to create a mesmerizing steampunk prop that looks both vintage and intricate? If so, building a steampunk compass is a perfect project to bring that vision to life. The key to capturing the authentic steampunk aesthetic lies in embracing a vintage design combined with detailed gear mechanisms. You want your compass to evoke the feeling of an old-world navigation device, but with a mechanical twist that hints at hidden complexity and craftsmanship.
Start by gathering your materials. You’ll need a sturdy base, such as a round wooden or metal disk, which provides an authentic vintage look. To enhance the vintage design, consider distressing or aging the surface with paint or sandpaper for a weathered finish. This step immediately sets the tone for your prop, giving it a sense of history and character. Next, focus on your gear mechanisms. These are the heart of your steampunk compass. Small, intricately cut gears, clock parts, and cogs can be sourced from craft stores or repurposed from old clocks and watches. Arrange these gear parts around the perimeter of your base or in a central cluster, and secure them with strong adhesive or tiny screws. The interconnected gears should appear functional, as if they’re part of a mechanical system driving the compass needle.
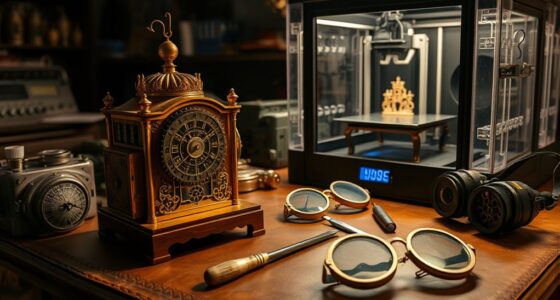
Gather aged gears and a sturdy base to craft your authentic steampunk compass.
The compass needle itself can be fashioned from a thin metal rod or a painted piece of stiff wire. Mount it on a pivot point at the center of your base, making sure it moves freely. To give your compass an authentic touch, incorporate a glass or clear plastic cover over the face, mimicking the protective glass of vintage navigational instruments. Add decorative elements around the edge, such as rivets, ornate metal accents, or even small clock hands, to emphasize the vintage design. These details reinforce the steampunk aesthetic and suggest a device built for exploration and adventure.
Furthermore, exploring vintage design elements can help you incorporate historical details that enhance the authenticity of your prop. Finally, paint or stain the entire assembly with metallic tones—brass, copper, and antique gold work well—highlighting the gear mechanisms and vintage accents. Weather the finish further with darker washes or dry brushing to add depth and dimension. When finished, your steampunk compass will not only look stunning but also serve as a functional-looking piece that combines Victorian charm with mechanical ingenuity. This project allows you to blend artistry with craftsmanship, creating a prop that feels like it belongs in a steampunk universe, full of gear mechanisms and vintage design elements.
As an affiliate, we earn on qualifying purchases.
Frequently Asked Questions
What Materials Are Best for a Lightweight Steampunk Compass?
For a lightweight steampunk compass, you should use metal alloys like aluminum or brass because they’re sturdy yet light. Pair these with lightweight plastics for the decorative parts to keep the overall weight down. Using aluminum reduces bulk, while brass adds an authentic steampunk feel. Combining these materials guarantees your compass feels solid without being heavy, making it comfortable to wear or display while maintaining that vintage, industrial look.
How Can I Add LED Lighting to My Compass?
You can add LED lighting to your compass by integrating small, battery-powered LEDs into the design. Many believe LED integration enhances steampunk aesthetics through dynamic lighting effects. To do this, carefully drill small holes for the LEDs, connect them to a tiny switch and battery, then hide the wiring for a seamless look. Using warm-colored LEDs creates an authentic vintage glow, elevating your compass’s steampunk charm.
Is There an Easy Way to Make the Compass Waterproof?
Yes, you can make your compass waterproof easily. First, apply a waterproof sealing around all joints and moving parts to prevent water ingress. Then, coat the entire compass with a water-resistant coating like clear sealant or resin. Make sure the sealing is thorough and dries completely before exposure to water. This approach keeps your compass protected from moisture while maintaining its steampunk aesthetic.
Can I Customize the Compass Size for Different Projects?
Did you know that customizable models can improve project adaptability by up to 50%? You can easily adjust your compass size for different projects by incorporating scale adjustment features into your design. This allows you to enhance your design flexibility, ensuring your steampunk compass fits perfectly with various props or displays. Simply modify the frame dimensions or use modular parts, and you’ll have a versatile, personalized piece that suits any steampunk adventure.
What Tools Are Essential for Detailed Compass Engraving?
To achieve detailed compass engraving, you need precision tools like fine-tipped gravers, jeweler’s files, and a steady hand. Use engraving techniques such as line work and shading to add intricate designs. These tools help you control depth and accuracy, ensuring your details are crisp and clean. With patience and skill, you can create stunning, elaborate engravings that bring your steampunk compass to life.
As an affiliate, we earn on qualifying purchases.
Conclusion
Now that you’ve crafted your steampunk compass, you’re all set to navigate any adventure—though, with all those gears and cogs, you might just get lost in your own creation. Irony isn’t lost on this vintage marvel; it points the way while making sure you stay wonderfully off-course. So, go ahead, trust your new compass. Just don’t forget—it’s more about the journey than directions. After all, what’s a steampunk explorer without a little chaos?
As an affiliate, we earn on qualifying purchases.
As an affiliate, we earn on qualifying purchases.
Halloween Picks
halloween
As an affiliate, we earn on qualifying purchases.