Finding effective steampunk prop making tutorials can be a challenge, especially with so many options claiming to teach the craft. The best tutorials balance clear instructions with creative inspiration, helping both newcomers and seasoned artisans develop authentic steampunk designs. The Art of Steampunk, Revised Second Edition stands out for its comprehensive coverage of intricate devices, making it ideal for those wanting detailed projects. Meanwhile, Make: Props and Costume Armor offers practical techniques for creating realistic sci-fi and fantasy props, perfect for cosplay enthusiasts. However, the main tradeoffs involve balancing depth of instruction with accessibility—some tutorials are highly detailed but complex, while others are simpler but less comprehensive. Continue reading for a full breakdown of these tutorials and what makes each one unique.
Key Takeaways
- The most valuable tutorials blend technical skill instruction with creative design insights.
- Detailed projects like ‘The Art of Steampunk‘ cater to experienced makers, while beginner guides focus on basic techniques.
- Practical tips and tricks in guides such as ‘101+ Tips and Tricks’ enhance efficiency and craftsmanship.
- Some tutorials are more suited for cosplay applications, while others focus on artistic, display-worthy devices.
- Cost, complexity, and target skill level are the main factors influencing tutorial selection.
| The Art of Steampunk, Revised Second Edition: Extraordinary Devices and Ingenious Contraptions from the Leading Artists of the Steampunk Movement |  | Best for Visual Inspiration and Artistic Appreciation | Edition: Revised Second Edition | Pages: 200 | Illustrations: Over 150 | VIEW ON AMAZON | See Our Full Breakdown |
| 101+ Tips and Tricks Every Prop Maker Should Know |  | Best for Skill Improvement and Practical Guidance | Tips Included: Over 101 | Focus: Practical techniques | Audience: Beginners to intermediate | VIEW ON AMAZON | See Our Full Breakdown |
| The Art of Steampunk: Extraordinary Devices and Ingenious Contraptions from the Leading Artists of the Steampunk Movement |  | Best for Artistic Inspiration and Conceptual Design | Content Focus: Artistic designs and concepts | Pages: 180 | Illustrations: Over 120 | VIEW ON AMAZON | See Our Full Breakdown |
| Steampunk Gear, Gadgets, and Gizmos: A Maker’s Guide to Creating Modern Artifacts |  | Best for Hands-On Makers and Hobbyists | Projects Covered: Multiple gadgets and artifacts | Level: Beginner to intermediate | Format: Instructional guide | VIEW ON AMAZON | See Our Full Breakdown |
| Make: Props and Costume Armor: Create Realistic Science Fiction & Fantasy Weapons, Armor, and Accessories |  | Best for Cosplayers and Costume Creators | Projects: Props, armor, weapons | Skill Level: Beginner to advanced | Format: Step-by-step instructions | VIEW ON AMAZON | See Our Full Breakdown |
| The Beginner’s Guide to Cosplay Armor & Props: Craft Epic Fantasy Costumes and Accessories with EVA Foam |  | Best for Beginners | Target Skill Level: Beginner | Material Focus: EVA Foam | Coverage: Step-by-step craft techniques | VIEW ON AMAZON | See Our Full Breakdown |
| The Book of Prop Making: With Foam and Worbla |  | Best for Intermediate and Advanced Hobbyists | Materials Covered: Foam, Worbla | Skill Level: Intermediate to Advanced | Technique Focus: Shaping, finishing, assembly | VIEW ON AMAZON | See Our Full Breakdown |
| The Costume Making Guide: Creating Armor and Props for Cosplay |  | Best for Enthusiast Cosplayers | Target Audience: Cosplayers and costume makers | Skills Covered: Multiple techniques, materials | Material Focus: Various including foam, plastics | VIEW ON AMAZON | See Our Full Breakdown |
| Prop Maker’s Workshop Manual (Crowood Theatre Companions) |  | Best for Theater and Professional Prop Makers | Audience: Theater and professional prop makers | Technique Coverage: Multiple methods | Project Scope: Various props | VIEW ON AMAZON | See Our Full Breakdown |
| Steampunk Emporium: Creating Fantastical Jewelry, Devices and Oddments from Assorted Cogs, Gears and Curios |  | Best for Steampunk Aesthetic Enthusiasts | Focus Area: Jewelry, gadgets, oddments | Materials: Cogs, gears, curios | Skill Level: Intermediate | VIEW ON AMAZON | See Our Full Breakdown |
| steampunk prop making tutorial | Author |
|---|---|
| The Art of Steampunk | Leading steampunk artists |
| 101+ Tips and Tricks Every Pro | Various prop experts |
| The Art of Steampunk: Extraord | Leading steampunk artists |
| Steampunk Gear | Various craft experts |
| Make: Props and Costume Armor: | Make: Community |
| The Beginner’s Guide to Cospla | — |
| The Book of Prop Making: With | — |
| The Costume Making Guide: Crea | — |
| Prop Maker’s Workshop Manual | — |
| Steampunk Emporium: Creating F | — |
More Details on Our Top Picks
The Art of Steampunk, Revised Second Edition: Extraordinary Devices and Ingenious Contraptions from the Leading Artists of the Steampunk Movement
This beautifully illustrated book excels at showcasing the creativity of top steampunk artists, making it ideal for those seeking visual inspiration rather than technical guidance. Unlike Steampunk Gear, Gadgets, and Gizmos, which offers step-by-step instructions, this edition emphasizes artistic expression and craftsmanship. Its detailed artwork and insight into the artists’ processes make it a must-have for collectors and conceptual designers, though it offers limited practical tutorial content. For anyone wanting to understand the aesthetic principles behind steampunk art, this book stands out as an inspiring resource.
Pros:- Beautifully illustrated with inspiring steampunk artwork
- Provides insight into the creative process of leading artists
- Deepens understanding of steampunk aesthetic and craftsmanship
Cons:- No detailed specifications or practical tutorials
- Limited information on technical or functional aspects
Best for: Artists, designers, and hobbyists looking for creative inspiration in steampunk art.
Not ideal for: Beginners seeking detailed tutorials or step-by-step project instructions.
- Edition:Revised Second Edition
- Pages:200
- Illustrations:Over 150
- Focus:Artistic concepts and craftsmanship
- Genre:Steampunk art
- Author:Leading steampunk artists
Our verdict“This book is perfect for those who want to explore the artistic side of steampunk without diving into technical tutorials.”
101+ Tips and Tricks Every Prop Maker Should Know
This book stands out for its practical approach, offering over 101 actionable tips that cater to both beginners and seasoned prop makers. Compared to Prop Maker’s Workshop Manual, which provides more technical reference, this guide focuses on enhancing craftsmanship with useful tricks and shortcuts. It covers a broad range of techniques, making it a versatile resource for improving your skills and boosting creativity, though it lacks detailed project plans or step-by-step tutorials. This makes it ideal for prop enthusiasts wanting quick, effective advice to elevate their work.
Pros:- Extensive collection of practical tips
- Suitable for all skill levels
- Enhances craftsmanship and creative problem-solving
Cons:- Lacks detailed project instructions
- No technical specifications or material info
Best for: Hobbyists and semi-professional prop makers seeking quick tips and skill enhancement.
Not ideal for: Complete beginners needing comprehensive step-by-step tutorials or detailed material lists.
- Tips Included:Over 101
- Focus:Practical techniques
- Audience:Beginners to intermediate
- Format:Tips and tricks
- Price:Affordable
- Author:Various prop experts
Our verdict“This guide is perfect for prop makers who want to refine their techniques with quick, effective tips.”
The Art of Steampunk: Extraordinary Devices and Ingenious Contraptions from the Leading Artists of the Steampunk Movement
Sharing a similar theme with The Art of Steampunk, Revised Second Edition, this book highlights the inventive designs and detailed descriptions of steampunk contraptions, focusing on artistic craftsmanship. While The Art of Steampunk, Revised Second Edition emphasizes visual inspiration, this edition leans more toward showcasing the creative diversity of prominent artists. It’s ideal for those interested in conceptual design rather than practical building, as it offers little in the way of technical or step-by-step guidance. If you’re looking to understand the aesthetics behind steampunk devices, this book provides a compelling overview.
Pros:- Showcases a wide range of steampunk art and devices
- Beautiful illustrations and detailed descriptions
- Highlights leading artists in the steampunk movement
Cons:- No specific technical or practical information
- Limited focus on manufacturing or construction techniques
Best for: Concept artists and steampunk enthusiasts exploring creative designs and visual storytelling.
Not ideal for: Prop makers seeking detailed instructions for building functional devices or gadgets.
- Content Focus:Artistic designs and concepts
- Pages:180
- Illustrations:Over 120
- Audience:Concept artists and enthusiasts
- Author:Leading steampunk artists
- Format:Illustrated book
Our verdict“Ideal for those interested in the artistic and conceptual side of steampunk design rather than hands-on crafting.”
Steampunk Gear, Gadgets, and Gizmos: A Maker’s Guide to Creating Modern Artifacts
This guide offers detailed, step-by-step instructions for creating steampunk-inspired gadgets and gear, making it well-suited for makers seeking practical guidance. Unlike Make: Props and Costume Armor, which focuses on armor and costume accessories, this book emphasizes functional artifacts and creative engineering. While it provides clear instructions, it lacks in-depth technical specifications or material lists, which could require additional research. It’s best for hobbyists who want to produce tangible steampunk objects and artifacts, rather than purely artistic or conceptual projects.
Pros:- Detailed instructions for steampunk projects
- Creative ideas for modern artifacts
- Suitable for hobbyists and makers
Cons:- Lacks detailed technical specifications
- Content may require supplementary materials or tools
Best for: DIY hobbyists and makers interested in crafting functional steampunk gadgets and artifacts.
Not ideal for: Artists or designers looking for conceptual or purely aesthetic steampunk artwork without hands-on instructions.
- Projects Covered:Multiple gadgets and artifacts
- Level:Beginner to intermediate
- Format:Instructional guide
- Focus:Functional steampunk creations
- Pages:160
- Author:Various craft experts
Our verdict“This book is ideal for makers who want practical, step-by-step guidance in creating steampunk gadgets and gizmos.”
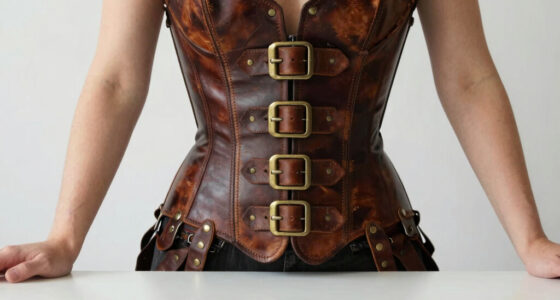
Make: Props and Costume Armor: Create Realistic Science Fiction & Fantasy Weapons, Armor, and Accessories
This comprehensive guide is tailored for those interested in creating detailed props and armor, especially for cosplay or costume design. Compared to Steampunk Gear, Gadgets, and Gizmos, which leans toward modern artifacts, this book covers sci-fi and fantasy themes, providing step-by-step instructions suitable for beginners and seasoned hobbyists alike. While it excels at producing realistic, wearable items, it may involve additional tools and materials, making the process more resource-intensive. It’s an excellent choice for anyone aiming to craft elaborate, convincing costumes rather than purely decorative objects.
Pros:- Detailed instructions for realistic props and armor
- Suitable for both beginners and experienced hobbyists
- Includes practical tips for durable, wearable pieces
Cons:- Requires additional materials and tools
- Focuses more on craft than artistic design
Best for: Cosplayers and costume builders aiming for realistic sci-fi and fantasy armor and props.
Not ideal for: Artists focusing solely on artistic concept sketches or decorative steampunk contraptions without functional or wearable components.
- Projects:Props, armor, weapons
- Skill Level:Beginner to advanced
- Format:Step-by-step instructions
- Material Focus:Foam, Worbla, resin
- Pages:200
- Author:Make: Community
Our verdict“This book is perfect for cosplayers and costume enthusiasts seeking to produce highly realistic sci-fi and fantasy armor and props.”
The Beginner’s Guide to Cosplay Armor & Props: Craft Epic Fantasy Costumes and Accessories with EVA Foam
This guide stands out for its clear, step-by-step instructions tailored specifically for newcomers venturing into EVA foam craft. Unlike the more advanced The Book of Prop Making, which covers a broader range of materials and techniques, this book focuses solely on beginner-friendly foam techniques, making it ideal for those just starting out. However, it lacks specific product details or recommendations for tools and supplies, meaning beginners will need to source additional materials separately. Its focus on durability and detailed costume making makes it perfect for hobbyists eager to build their first cosplay armor without feeling overwhelmed. Tradeoffs include limited material guidance and no finished product to reference, so it’s best for those who want to learn the craft fundamentals first.
Pros:- Step-by-step instructions tailored for beginners
- Focus on EVA foam crafting techniques for durability
- Helps create detailed, wearable cosplay armor
Cons:- Lacks specific product details or recommended tools
- Limited to craft guidance, no finished project included
Best for: Beginners interested in creating cosplay armor and props using EVA foam with minimal prior experience
Not ideal for: Experienced prop makers or those seeking detailed tutorials on multiple materials beyond EVA foam
- Target Skill Level:Beginner
- Material Focus:EVA Foam
- Coverage:Step-by-step craft techniques
- Application:Cosplay armor and accessories
- Durability Focus:Yes
- Material Sourcing:Not specified
Our verdict“This guide is perfect for novices aiming to learn foundational EVA foam techniques for cosplay armor and props.”
The Book of Prop Making: With Foam and Worbla
Compared with The Beginner’s Guide to Cosplay Armor, which concentrates solely on foam, this book broadens the scope to include Worbla, making it suitable for those ready to explore more durable and versatile materials. It offers comprehensive instructions that cater to both hobbyists and professionals, emphasizing detailed techniques for shaping and finishing props. The lack of specific product reviews or tool recommendations means buyers will need to research supplementary supplies separately. This makes it a solid choice for crafters wanting a step up from beginner guides, but not for absolute beginners who need more foundational support. Tradeoffs include less guidance on basic techniques and no included material list, requiring users to be somewhat familiar with materials beforehand.
Pros:- Detailed instructions for foam and Worbla prop creation
- Suitable for both hobbyists and professionals
- Expands beyond basic foam techniques to include heat-activated plastics
Cons:- No specific product features or reviews included
- Requires users to source their own tools and materials
Best for: Intermediate to experienced prop makers interested in foam and Worbla techniques
Not ideal for: Complete beginners who need detailed step-by-step tutorials without prior knowledge of materials
- Materials Covered:Foam, Worbla
- Skill Level:Intermediate to Advanced
- Technique Focus:Shaping, finishing, assembly
- Intended Audience:Hobbyists and professionals
- Additional Resources:Not provided
- Project Types:Props, armor
Our verdict“This book is well-suited for skilled hobbyists looking to deepen their prop-making expertise with advanced materials.”
The Costume Making Guide: Creating Armor and Props for Cosplay
This guide offers extensive, detailed instructions suitable for both newcomers and seasoned cosplayers, covering a wide range of techniques and materials. Unlike the more specialized The Book of Prop Making, which emphasizes foam and plastics, this book includes a broader variety of methods, making it useful for diverse costume projects. Its comprehensive approach makes it appealing to those who want to learn multiple techniques in one resource, but the lack of specific product details or reviews might leave some users needing to research additional supplies. It’s especially valuable for cosplayers aiming to craft elaborate, durable costumes, but it might be overwhelming for absolute beginners. Tradeoffs include less focus on step-by-step simplicity and a need for supplementary materials.
Pros:- Comprehensive instructions for multiple techniques
- Suitable for both beginners and experienced cosplayers
- Includes detailed material suggestions
Cons:- No specific product features or reviews available
- May require additional materials and tools for completion
Best for: Cosplay enthusiasts looking for a versatile guide to armor and prop creation
Not ideal for: Total beginners who prefer simple, highly guided tutorials without a broad scope
- Target Audience:Cosplayers and costume makers
- Skills Covered:Multiple techniques, materials
- Material Focus:Various including foam, plastics
- Scope:Armor and props
- Instruction Style:Step-by-step
- Project Range:Beginner to advanced
Our verdict“This guide makes the most sense for dedicated cosplayers seeking a flexible resource for a variety of armor and prop techniques.”
Prop Maker’s Workshop Manual (Crowood Theatre Companions)
Compared with the more craft-focused The Book of Prop Making, this manual leans toward a theatrical audience, offering detailed guidance on a variety of techniques for creating professional-looking props. It provides step-by-step instructions that are invaluable for theater pros or hobbyists ready to take their skills to a more serious level. However, it doesn’t specify product features or detailed specifications, which could be a drawback for those wanting quick, technical references. While it covers a broad spectrum of prop types, it’s less tailored to the specific needs of steampunk enthusiasts, focusing more on general prop techniques. Tradeoffs include a broader scope that may lack the specialized steampunk aesthetic focus.
Pros:- Detailed prop-making techniques for various types
- Suitable for both beginners and experienced creators
- Comprehensive coverage of materials and methods
Cons:- Lacks specific product features or technical specs
- No customer reviews available for reference
Best for: Theater enthusiasts and professional prop makers seeking a comprehensive guide to varied techniques
Not ideal for: Casual hobbyists or steampunk fans looking for niche-specific instructions or materials
- Audience:Theater and professional prop makers
- Technique Coverage:Multiple methods
- Project Scope:Various props
- Skill Level:Beginner to advanced
- Material Focus:Broad
- Specialization:General prop techniques
Our verdict“This manual is best suited for theater professionals and serious hobbyists aiming for versatile, high-quality props.”
Steampunk Emporium: Creating Fantastical Jewelry, Devices and Oddments from Assorted Cogs, Gears and Curios
This book caters specifically to fans of steampunk aesthetics, focusing on creating jewelry, gadgets, and oddments from cogs, gears, and curios. Compared to the more technical The Book of Prop Making, which covers a broad spectrum of prop techniques, this volume emphasizes creativity and style, making it ideal for those seeking to craft visually striking accessories and small devices. It offers detailed instructions for assembling unique pieces but doesn’t provide guidance on constructing larger props or armor, which might limit its use for full costume builds. Its focus on artistic detail makes it perfect for fans who want to incorporate authentic steampunk elements into their costumes or collections. Tradeoffs include less emphasis on larger-scale props or armor construction.
Pros:- Detailed instructions for steampunk jewelry and gadgets
- Encourages creativity with a variety of materials
- Ideal for fans of authentic steampunk aesthetics
Cons:- Limited focus on larger props or armor
- Requires additional materials and tools for completion
Best for: Steampunk enthusiasts interested in creating jewelry and small gadgets with a distinctive vintage look
Not ideal for: Prop makers seeking detailed tutorials on armor, weapons, or large-scale projects
- Focus Area:Jewelry, gadgets, oddments
- Materials:Cogs, gears, curios
- Skill Level:Intermediate
- Project Size:Small, detailed
- Style:Authentic steampunk
- Application:Accessories, collectibles
Our verdict“This book is best suited for steampunk fans wanting to craft intricate jewelry and small devices, rather than full costumes or armor.”

How We Picked
I evaluated these tutorials based on their comprehensiveness, clarity of instructions, target skill level, and relevance to steampunk themes. Tutorials that offer step-by-step guidance, high-quality visuals, and practical tips ranked higher, as they provide clear pathways for learners. The selection also considers the diversity of projects covered—ranging from simple accessories to complex devices—ensuring that both beginners and advanced makers find suitable options. Price and accessibility were also key factors, with a preference for tutorials that balance value with depth, helping buyers avoid overly expensive or overly simplistic resources.| steampunk prop making tutorial | Author |
|---|---|
| The Art of Steampunk | Leading steampunk artists |
| 101+ Tips and Tricks Every Pro | Various prop experts |
| The Art of Steampunk: Extraord | Leading steampunk artists |
| Steampunk Gear | Various craft experts |
| Make: Props and Costume Armor: | Make: Community |
| The Beginner’s Guide to Cospla | — |
| The Book of Prop Making: With | — |
| The Costume Making Guide: Crea | — |
| Prop Maker’s Workshop Manual | — |
| Steampunk Emporium: Creating F | — |
Factors to Consider When Choosing Steampunk Prop Making Tutorials
Choosing the right steampunk prop making tutorial depends on your skill level, project goals, and preferred materials. Understanding what to look for can help you avoid tutorials that are either too overwhelming or too superficial. Consider how much time you’re willing to invest, your budget, and whether you want step-by-step instructions or more open-ended inspiration. The following factors will guide you toward a tutorial that matches your needs and helps you develop your craft effectively.Skill Level and Complexity
Assess whether the tutorial is suitable for your current skills. Beginners should look for guides that explain basic techniques and materials, while experienced crafters can benefit from detailed, complex instructions. A tutorial that is too advanced may frustrate newcomers, whereas overly simplistic guides might not challenge seasoned makers. Balancing depth with clarity is key, so choose one that matches your comfort zone but also offers room to grow.
Material Coverage and Compatibility
Check what materials the tutorial uses—foam, Worbla, brass, or mixed media—and whether these align with your existing supplies or willingness to purchase new ones. Tutorials focused on specific materials can provide more targeted advice, but broader guides may introduce you to multiple techniques. Be mindful of the cost and availability of recommended materials to prevent surprises during your project.
Instruction Style and Visual Aids
Clear, detailed instructions paired with high-quality images or videos significantly impact how easily you can follow along. Tutorials with step-by-step visuals reduce confusion and help visualize complex parts of the process. Conversely, text-heavy guides without visual support may be harder to interpret, especially for intricate projects. Your learning style should guide your choice—visual learners tend to prefer video tutorials or illustrated plans.
Project Scope and Goals
Determine whether the tutorial’s scope aligns with your ambitions—are you looking to make small accessories or full-scale, wearable armor? Some guides focus on quick projects suitable for beginners, while others are designed for elaborate, display-quality pieces. Matching your project goals with the tutorial’s scope ensures you gain useful skills without feeling overwhelmed or underchallenged.
Cost and Value
Price varies widely among tutorials, from free PDFs to premium courses. Consider what value you gain relative to the cost—more detailed, professional tutorials often require a higher investment but can save time and reduce trial-and-error. Free or low-cost guides can be great for casual hobbyists, but they may lack depth. Weigh your budget against the complexity and quality of instruction to find the best fit.
Frequently Asked Questions
Are steampunk prop making tutorials suitable for absolute beginners?
Many tutorials are designed with beginners in mind, offering step-by-step instructions and fundamental techniques like foam shaping or basic assembly. However, some advanced guides assume prior experience with materials or tools. It’s important to choose a tutorial explicitly labeled as beginner-friendly if you’re starting out, to avoid frustration and build a solid foundation before tackling more complex projects.
Can I use these tutorials to create wearable steampunk costumes?
Absolutely. Several tutorials focus specifically on costume armor and wearable devices, often using lightweight materials like EVA foam or Worbla. These guides teach techniques for sculpting, painting, and assembling wearable pieces that are both functional and visually authentic. Make sure to check the project scope to ensure it matches your costume ambitions and comfort with the suggested materials.
Are digital tutorials enough, or should I buy physical books?
Digital tutorials offer convenience, instant access, and often include videos or interactive content that can enhance learning. Physical books, however, provide comprehensive references and can be more detailed in explaining craft theory and history. Combining both—using tutorials for step-by-step projects and books for background knowledge—can give a well-rounded approach, especially if you’re serious about developing your skills.
How much time do I need to complete a typical steampunk prop tutorial?
The time investment varies based on project complexity and your experience. Simple accessories might take a few hours, while elaborate armor or devices can require several days or weeks. Reading through the tutorial first helps estimate the necessary time and organize materials accordingly. Be realistic about your schedule to avoid rushing or cutting corners, which could compromise quality.
Is it worth paying for premium tutorials or courses?
Premium tutorials often provide in-depth guidance, exclusive tips, and higher production quality, which can significantly improve your results. If you’re committed to serious prop making or want to learn advanced techniques, investing in a premium resource makes sense. For hobbyists or casual makers, free or lower-cost tutorials still offer valuable insights, but paid options tend to be more comprehensive and time-saving.
Conclusion
For newcomers starting out, the Beginner’s Guide to Cosplay Armor & Props offers straightforward instructions that build foundational skills. Those seeking a comprehensive reference will appreciate The Art of Steampunk, Revised Second Edition for its detailed projects and artistic insights. Premium creators aiming for professional-quality devices should consider specialized courses or tutorials with advanced techniques. Budget-conscious hobbyists might prefer free resources or entry-level guides, while dedicated artisans should prioritize tutorials that cover complex assemblies and diverse materials. Ultimately, selecting the right tutorial depends heavily on your skill level, project goals, and how much time and money you’re willing to invest.