
To achieve weathered finishes with a desktop sandblaster, start by wearing safety gear like goggles, gloves, and a dust mask. Work in a well-ventilated, clutter-free space and choose the right abrasive medium, adjusting the pressure carefully for even results. Keep the nozzle steady and at a consistent distance from the surface, practicing on scrap first. With control and patience, you’ll create authentic weathered looks—continue exploring for detailed tips to perfect your technique.
Key Takeaways
- Wear protective gear and work in a well-ventilated area to ensure safety during sandblasting.
- Select and fill the sandblaster with the appropriate abrasive medium for weathered effects.
- Adjust the pressure settings and hold the nozzle at a consistent distance for even weathered finishes.
- Maintain steady movement of the nozzle and practice on scrap to master even erosion techniques.
- Clean the equipment and workspace thoroughly after use to prolong equipment life and ensure safety.
If you want to achieve a weathered, vintage look on your surfaces, a desktop sandblaster offers a convenient and precise way to do so. Before you start, it’s vital to understand safety precautions. Sandblasting involves propelling abrasive particles at high speed, which can create harmful dust and debris. Always wear protective gear like goggles, a dust mask or respirator, and gloves. Work in a well-ventilated area to prevent inhaling dust or fumes. Keep bystanders at a safe distance, and guarantee your workspace is free of clutter to avoid accidents. These safety measures are essential to protect your health and guarantee a safe working environment.
Once safety is sorted, you can focus on setting up your desktop sandblaster. Proper equipment maintenance is key to achieving consistent results and prolonging the lifespan of your tool. Regularly inspect hoses, nozzles, and fittings for wear or damage, replacing parts as needed. Clean the abrasive tank after each use to prevent clogging and buildup that could affect performance. Use the recommended abrasive material for your project and avoid mixing different types, as this can cause inconsistent finishes or damage to the equipment. Lubricate moving parts periodically, following the manufacturer’s instructions, to keep everything operating smoothly. Well-maintained equipment not only produces better weathered effects but also reduces the risk of malfunctions or accidents during use. Additionally, understanding the different types of abrasive materials can help you select the best option for your desired finish abrasive materials. It’s also beneficial to familiarize yourself with appropriate safety gear to ensure complete protection during your project.
Regularly inspect, clean, and lubricate your sandblaster for optimal performance and safety.
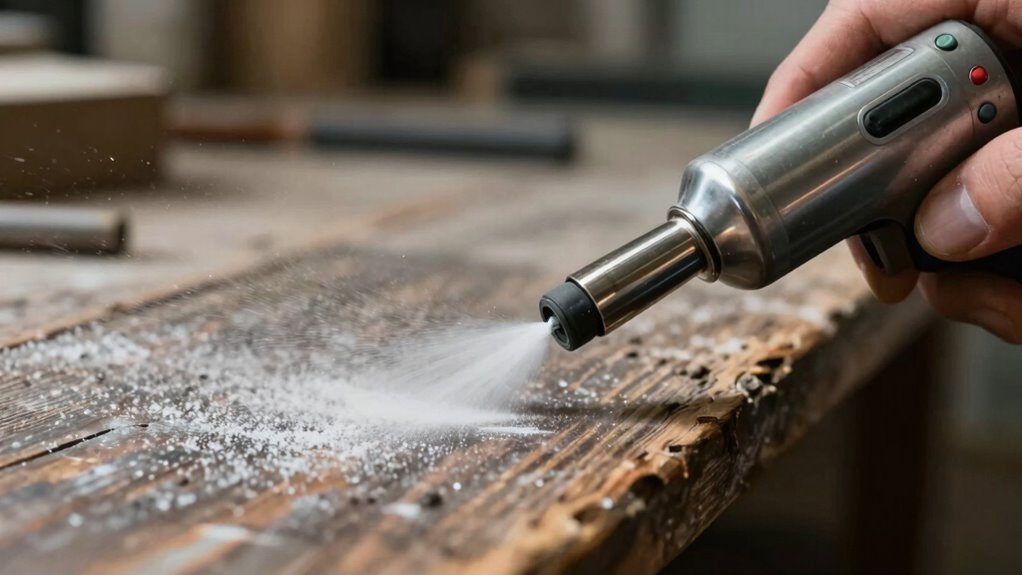
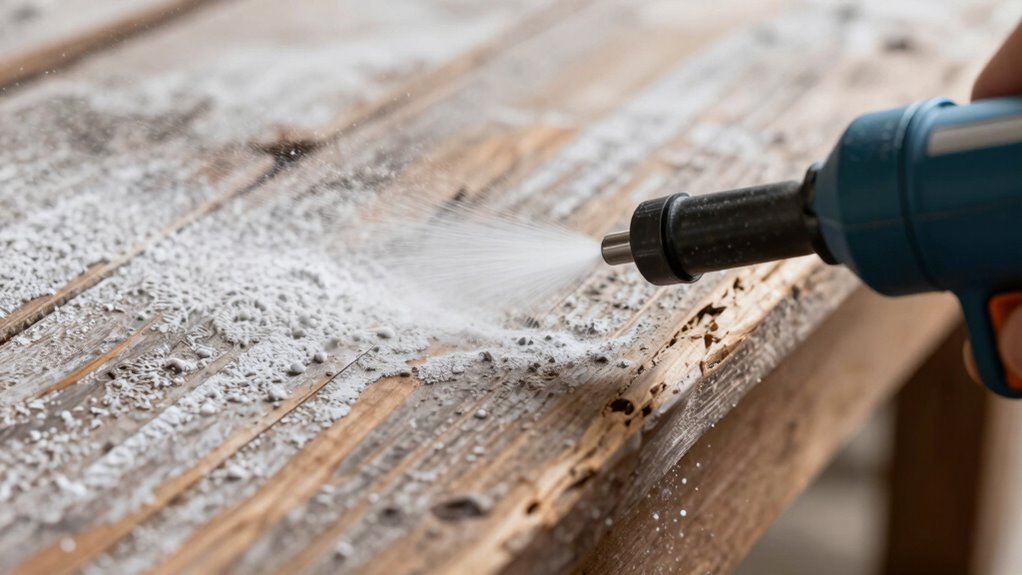
When you’re ready to start, fill the sandblaster with the appropriate abrasive medium—usually aluminum oxide, glass beads, or silica sand—based on your desired weathered look. Adjust the pressure settings carefully; too high can erode surfaces unevenly, while too low might not give you the desired effect. Hold the nozzle at a consistent distance from the surface, moving it steadily to ensure an even finish. Practice on scrap material first to get a feel for the technique, then proceed to your actual project. Keep in mind that patience and control are vital, especially when creating specific weathered patterns or textures. Proper technique is essential to achieve the best results and avoid damaging your surfaces.
Throughout the process, stay vigilant about safety and equipment care. Regularly pause to check your tools, clear away dust, and ensure everything functions properly. After finishing, clean your workspace thoroughly, and inspect your equipment again before storing it. Proper safety precautions and diligent equipment maintenance are the backbone of achieving professional-looking weathered surfaces with your desktop sandblaster, making the entire project safer, more efficient, and ultimately more satisfying.

Aluminum Oxide – 10 LBS – Medium to Fine Sand Blasting Abrasive Media for Blasting Cabinet or Blasting Guns. #80 GRIT
Angular Shaped Particles Clean and Etch Surfaces
As an affiliate, we earn on qualifying purchases.
As an affiliate, we earn on qualifying purchases.
Frequently Asked Questions
Can I Use a Desktop Sandblaster on Delicate or Painted Surfaces?
You can use a desktop sandblaster on delicate or painted surfaces, but you need to be cautious. It’s essential for surface preparation and paint removal to adjust the pressure and use a fine abrasive. Test on a small, hidden area first to prevent damage. Keep the blast at a safe distance and work gently to avoid stripping paint or harming delicate finishes. Proper technique guarantees a clean, weathered look without unnecessary damage.
What Safety Gear Is Essential When Operating a Desktop Sandblaster?
When operating a desktop sandblaster, you need essential personal protective equipment to guarantee workspace safety. Wear a dust-resistant respirator to avoid inhaling fine particles, safety goggles to protect your eyes, and heavy-duty gloves for hand safety. A long-sleeved shirt and apron can shield your skin. Always operate in a well-ventilated area, and keep bystanders at a safe distance to prevent accidents and maintain a safe workspace.
How Do I Adjust the Pressure for Different Weathered Finishes?
You can fine-tune your finish variations by adjusting the pressure settings on your desktop sandblaster. Lower pressure, around 20-40 PSI, creates a softer, more weathered look, while higher pressure, up to 80 PSI, produces a more distressed surface. Start with a moderate setting, then experiment by gradually increasing or decreasing pressure to see how it affects the finish. Always test on scrap material first to achieve your desired weathered effect.
What Types of Abrasive Media Are Best for Weathered Effects?
For weathered effects, you should choose abrasive media types like glass beads, aluminum oxide, or walnut shells, which gently etch surfaces without damaging them. These media are ideal for weathered finish techniques because they create soft, textured looks that mimic natural aging. Experiment with different media to achieve your desired effect, and always test on a small area first to guarantee the finish meets your expectations.
How Do I Maintain and Clean My Desktop Sandblaster?
To maintain and clean your desktop sandblaster, always disconnect it from power before cleaning. Regularly inspect and replace worn abrasive media to guarantee effective equipment maintenance. Clean the nozzle and chamber with compressed air to prevent clogging, and wipe down external parts with a damp cloth. Properly storing abrasive media and using filters will extend your equipment’s lifespan. Consistent upkeep ensures peak performance and weathered finish results.

#120 Aluminum Oxide – 8 LBS – Fine Sand Blasting Abrasive Media for Blasting Cabinet and Blasting Guns.
Aluminum Oxide is harder than most blasting medias. Cleans and etches on all types of surfaces including glass.
As an affiliate, we earn on qualifying purchases.
As an affiliate, we earn on qualifying purchases.
Conclusion
Now that you know how to use your desktop sandblaster, you’ll be turning dull surfaces into stunning weathered masterpieces in no time. Think of it as giving your projects a fresh breath of life—like a phoenix rising from the ashes. Just remember to wear your safety gear and go easy on the pressure. With patience and practice, you’ll craft finishes that tell a story as rich as time itself.

QWORK Sand Blasting Hood Cap, Shawl Sandblaster Protective Gear Mask, Anti Dust/Wind Sandblasting Tool Mask, Heat / Cut / Scratch Resistant Neck Protector, White
Material: Sand Blasting Hood Cap is made of heavy duty canvas and single tape with plastic, with a…
As an affiliate, we earn on qualifying purchases.
As an affiliate, we earn on qualifying purchases.

Ziopetru Sand Blaster Gun – Gravity Feed Sandblaster Gun for Metal, Wood Paint/Rust Removal and Glass Etching – Handheld Sand Blaster Gun for Air Compressor, Up to 70-150 PSI Blasting Media, Blue
Portable SandBlaster Gun: The hand-held sandblaster gun has an ergonomic grip, is durable yet lightweight, can be pressed…
As an affiliate, we earn on qualifying purchases.
As an affiliate, we earn on qualifying purchases.