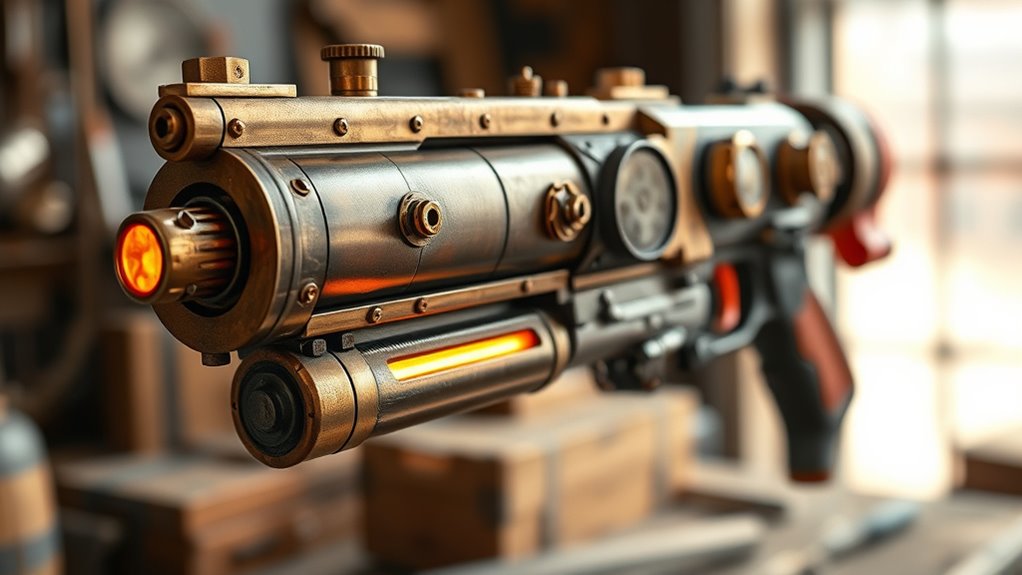

To create a DIY steampunk ray gun from a Nerf gun, start by selecting a sturdy base and gather metallic paints like gold, bronze, and copper. Attach vintage-inspired gears, brass fittings, and Victorian details to give it an industrial look. Use weathering techniques and dry brushing to add age and character. Finish with leather straps or chains for extra flair. Keep assembling and finishing until you achieve a detailed, vintage sci-fi weapon—if you want to learn more, there’s plenty of inspiring tips to explore.
Key Takeaways
- Select a sturdy Nerf gun base and plan a vintage Victorian steampunk design with gears, brass fittings, and Victorian accents.
- Securely attach embellishments such as gears, pipes, and decorative valves to create an intricate, industrial look.
- Use metallic paints and weathering techniques like dry brushing to achieve an authentic, aged steampunk finish.
- Add accessories like leather straps, chains, and Victorian-inspired details for extra texture and period accuracy.
- Finish with thorough drying, and consider weathering for a rugged, vintage appearance suitable for cosplay or decor.

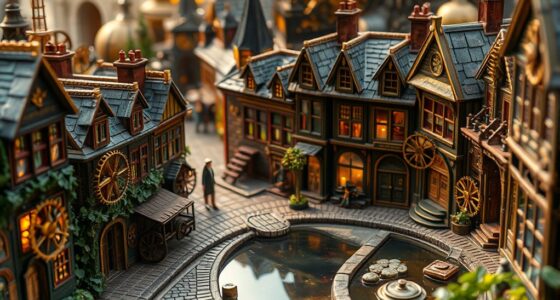
Ever wondered how to craft your own steampunk-inspired ray gun? If you’re into cosplay accessories and vintage decor, creating a custom steampunk ray gun can be an exciting project that combines creativity with craftsmanship. This DIY endeavor allows you to transform a simple Nerf gun into a stunning piece that fits perfectly into your steampunk costume or collection. The key is to blend vintage aesthetic elements with futuristic flair, turning a basic toy into a unique, eye-catching prop.
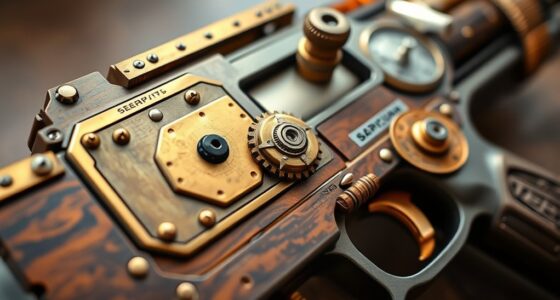
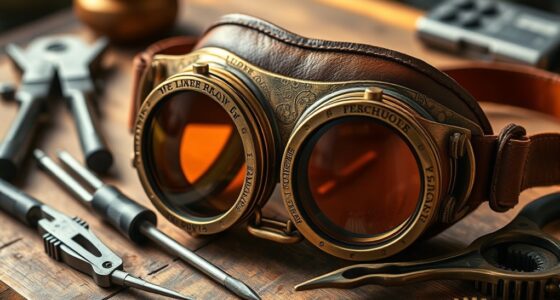
Start by gathering your materials. A Nerf gun serves as a solid base because of its size and shape, but you’ll want to personalize it with various embellishments. Think about using metallic paints, gears, brass fittings, and small pipes to evoke that vintage decor vibe. These elements aren’t just decorative; they give your ray gun a rugged, industrial look that’s essential for authentic steampunk style. As you assemble your pieces, keep in mind that the goal is to create a cohesive, intricate design that looks like a piece of vintage machinery rather than a simple toy. You might also want to include some Victorian-inspired accents, such as clock gears or ornate valves, to enhance the period feel.
Gather metallic paints, gears, and brass fittings to craft an authentic steampunk ray gun.
Once you’ve glued and attached your components securely, start painting. Metallic finishes—gold, bronze, or copper—are perfect for achieving that authentic vintage decor appearance. Use a combination of dry brushing and weathering techniques to give your ray gun a well-used, industrial look. Don’t be afraid to add small details like rivets or screws to really sell the steampunk aesthetic. These tiny touches make your cosplay accessories stand out and feel more realistic, especially when displayed as part of a costume or collection.
After the paint dries, consider adding some finishing touches like leather straps or small chains to give it a more rugged, vintage feel. These accessories not only enhance the aesthetic but also make your prop more comfortable to carry or display. Moreover, exploring anime movies can inspire unique design ideas for your cosplay, as many anime incorporate futuristic and vintage hybrid styles that align with steampunk themes. When you’re done, your DIY steampunk ray gun will look like a relic from an alternate Victorian future—perfect for cosplay events, themed photoshoots, or vintage decor displays. It’s a rewarding project that combines the allure of vintage machinery with the creative freedom of customizing your own cosplay accessories. Plus, it’s a fantastic way to showcase your craftsmanship and attention to detail, making your steampunk persona truly stand out.
Frequently Asked Questions
What Safety Precautions Should I Take During Modification?
You should always wear safety gear like goggles and gloves to protect yourself from sharp tools and debris. Make sure you work in a well-ventilated area to avoid inhaling fumes from paints or adhesives. Keep your workspace organized to prevent accidents, and handle all tools carefully. Taking these precautions helps keep you safe while you modify your Nerf gun, ensuring a fun and accident-free experience.
Can I Customize the Color Scheme Easily?
Yes, you can easily customize your ray gun’s color scheme with spray paint techniques. Start by choosing your favorite colors and applying a primer for a smooth finish. Use masking tape to create clean lines and add details. Spray evenly in light coats, allowing each layer to dry thoroughly. With these simple color customization tips, you’ll achieve a unique steampunk look that truly reflects your style.
How Durable Is the Steampunk Finish?
The steampunk paint finish is quite durable if you apply a good quality sealant. It offers decent surface protection against scratches and wear, but it’s not completely scratch-proof. To keep your design looking sharp, regularly touch up the paint finish and add a clear coat for extra surface protection. With proper care, your steampunk ray gun will maintain its vintage charm and withstand everyday use.
Are There Alternative Materials to Use?
You can definitely use alternative materials like brass or copper for a more authentic steampunk look. For example, a hobbyist replaced plastic with brass tubing, which added durability and aesthetic appeal. Always wear safety gear when working with these materials to prevent injuries. These alternatives not only enhance the gun’s appearance but also improve its sturdiness, making your project more impressive and long-lasting.
How Do I Troubleshoot if the Nerf Gun Malfunctions?
If your Nerf gun malfunctions, start with electronics troubleshooting by checking for loose wires or damaged components. Confirm all batteries are fresh and properly installed. Always wear safety gear like gloves and eye protection during troubleshooting to prevent injuries. Test the trigger mechanism and motor function systematically, and consult any wiring diagrams or manuals. If issues persist, consider replacing faulty parts or seeking expert advice to keep your modifications safe and functional.
Conclusion
Now that you’ve crafted your DIY steampunk ray gun, you’re officially a master of creative engineering—your masterpiece could rival a sci-fi prop from the future! Show off your incredible skills and let your friends marvel at your steampunk marvel. Remember, with your talent, you could turn any ordinary Nerf gun into a legendary gadget that might just blast through the fabric of reality itself. So, go ahead—ignite your imagination and keep creating extraordinary adventures!