
To create DIY steampunk pumpkins, start by selecting smooth pumpkins that you can easily paint with metallic finishes like bronze, copper, or gunmetal. Apply even coats of spray paint and add vintage elements such as gears, clock parts, and metal trinkets using hot glue. Enhance the look with LED lights or fairy lights inside or around the pumpkin for a warm glow. Finish with vintage-inspired props to make a stunning, industrial-themed Halloween display—your next step will reveal even more ideas.
Key Takeaways
- Select smooth pumpkins and paint with metallic shades like bronze or copper for a vintage industrial look.
- Attach vintage clock parts, gears, and metal trinkets using hot glue for a steampunk-inspired texture.
- Incorporate small LED or fairy lights inside or around the pumpkin to create a warm, illuminated effect.
- Seal the metallic paint properly to ensure durability and prevent chipping over time.
- Display on vintage trays or with industrial props for a cohesive steampunk Halloween centerpiece.
Looking to add a unique, vintage touch to your fall decor? Creating DIY steampunk pumpkin decor is a perfect way to combine Halloween spirit with a vintage industrial aesthetic. The key is to focus on incorporating metallic accents and vintage industrial elements that give your pumpkins a steampunk-inspired edge. Start by selecting the right pumpkins—preferably real or faux pumpkins with a smooth surface that can serve as your canvas. Once you have your pumpkins, gather metallic spray paints in shades like bronze, copper, or gunmetal to transform their natural orange into a steampunk-inspired metallic finish. This metallic coating instantly elevates the pumpkin’s look, making it stand out with a vintage industrial vibe.
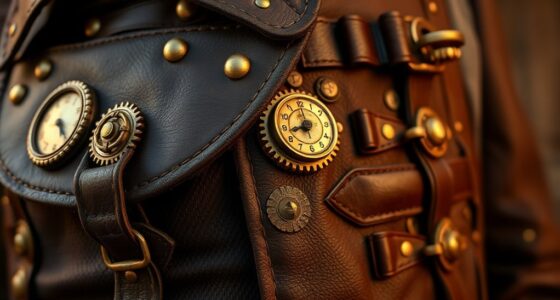
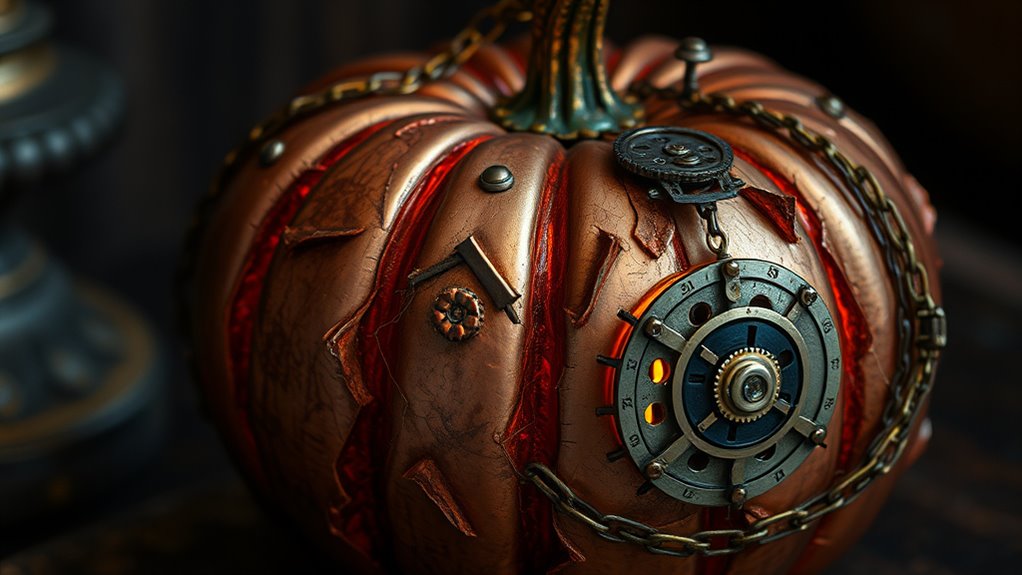
To enhance the steampunk aesthetic, incorporate vintage industrial elements like gears, clock parts, and small metal trinkets. You can glue or embed these metallic accents onto the pumpkin’s surface, creating a layered, textured look reminiscent of machinery and Victorian steampunk design. Use hot glue to attach tiny gears around the stem or along the pumpkin’s ridges for an authentic, mechanical feel. For a more sophisticated touch, consider using antique-looking clock faces or watch parts to serve as focal points, attaching them securely with strong adhesive. These metallic accents not only add visual interest but also give the pumpkin an aged, industrial charm that captures the essence of steampunk decor.
Add vintage gears and clock parts for authentic steampunk pumpkin accents.
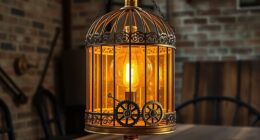
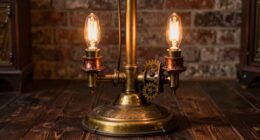
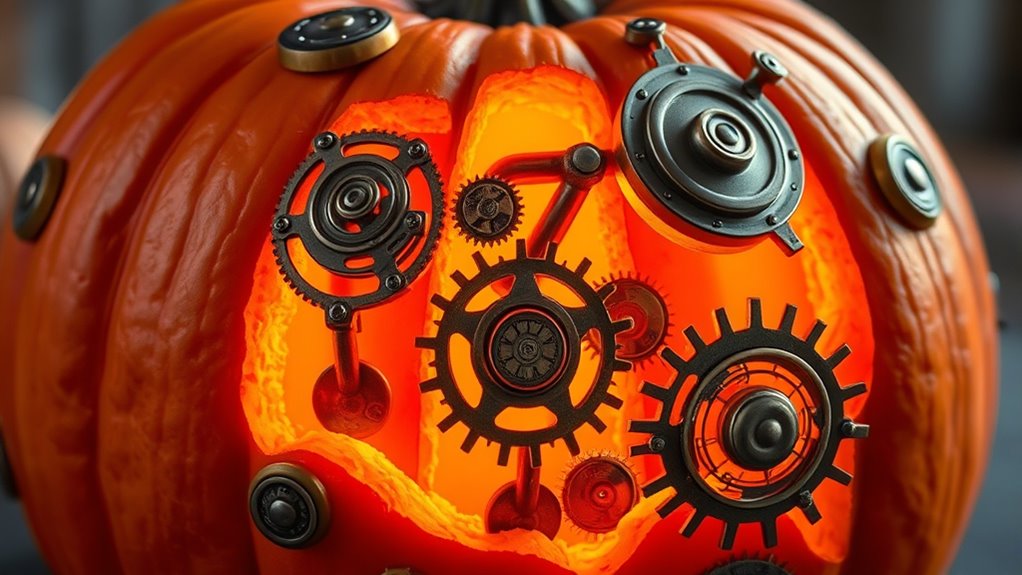
Lighting plays a vital role in bringing your steampunk pumpkin to life. Insert small LED lights or fairy lights inside the pumpkin to create a warm, glowing effect that highlights the metallic accents from the inside out. If you want to go further, attach vintage-style light bulbs or Edison bulbs to the stem or around the pumpkin base to cast an industrial glow. You can also wrap metallic wire or copper tubing around the pumpkin or use it to create a mechanical-looking handle or decorative element. These metallic details, combined with the glow from your lights, give your pumpkin a dynamic, vintage industrial feel that’s perfect for Halloween and fall displays.
Finish your steampunk pumpkin decor by placing it on a vintage-inspired tray or adding aged, metallic-looking props nearby. Think about using old machinery parts, metal cogs, or weathered metals to create a cohesive display. The combination of vintage industrial style and metallic accents transforms a simple pumpkin into a striking, steampunk masterpiece. To ensure your creation remains durable, remember that proper sealing techniques can help preserve the metallic finish and prevent chipping. Not only does this DIY project add a distinctive touch to your Halloween decor, but it also showcases your creativity and love for vintage, industrial design. With just a few materials and some imagination, you can craft a one-of-a-kind steampunk pumpkin that’s sure to impress your guests and elevate your fall decorations.

Krylon K05532007 COLORmaxx Spray Paint and Primer for Indoor/Outdoor Use, Gloss Pumpkin Orange 12 Ounce (Pack of 1)
SPRAY PAINT AND PRIMER – Krylon COLORmaxx Spray Paint and Primer delivers premium coverage and superior color with…
As an affiliate, we earn on qualifying purchases.
As an affiliate, we earn on qualifying purchases.
Frequently Asked Questions
What Tools Are Essential for Steampunk Pumpkin DIY?
You’ll need essential tools like hot glue guns, scissors, and pliers for your steampunk pumpkin DIY. Make sure you have metal gears and vintage clock parts on hand—they’re key for that authentic steampunk look. A craft knife helps with precise cuts, and wire cutters are useful for shaping metal pieces. With these tools, you can easily assemble and customize your pumpkin to achieve a detailed, vintage-inspired steampunk style.
Can I Use Real Pumpkins for Steampunk Decorations?
Using real pumpkins for steampunk decorations is like adding a touch of nature’s craftsmanship to your project. You can absolutely carve them, but keep in mind they may rot faster than artificial ones. To enhance their steampunk charm, paint your pumpkins with metallic options like copper, bronze, or silver. This adds a vintage, industrial look, making your pumpkin a true steampunk masterpiece that combines organic beauty with mechanical flair.
How Long Does Steampunk Pumpkin Decor Last?
Steampunk pumpkin decor typically lasts about one to two weeks, depending on your preservation methods. To extend its seasonal decoration longevity, you can seal the pumpkin with a clear spray or use a preservative solution. Keep it in a cool, dry place and avoid direct sunlight. Proper pumpkin preservation techniques help prevent mold and decay, ensuring your steampunk masterpiece stays impressive throughout the Halloween season.
Are There Eco-Friendly Alternatives for Steampunk Embellishments?
Yes, you can find eco-friendly alternatives for steampunk embellishments by using recycled materials like metal scraps, old gears, and vintage buttons. Biodegradable embellishments such as natural twine, dried flowers, and bamboo accents also work well. These options help reduce waste and environmental impact, giving your Halloween pumpkin a unique, sustainable touch. Embrace creativity with eco-conscious choices to enjoy stunning decor that’s kind to the planet.
How Do I Store My Steampunk Pumpkin Decorations?
To store your steampunk pumpkin decorations, use seasonal storage by carefully wrapping each piece with tissue paper or bubble wrap. Place them in decorative containers or sturdy plastic bins with lids to protect them from dust and damage. Label the containers clearly so you can easily find your Halloween pumpkin decor next season. Store them in a cool, dry place to prevent deterioration and guarantee they stay in great condition for next year.

ZOOFOX 300 Gram Gears Charms, Mixed Vintage Bronze Watch Cog Wheel Set, DIY Metal Steampunk Pendant for Crafting, Jewelry Making Accessory
High-quality Material: Our antique pendants are constructed of alloy material which is lead-free, nickel-free and durable, they adopted…
As an affiliate, we earn on qualifying purchases.
As an affiliate, we earn on qualifying purchases.
Conclusion
Now, with your steampunk pumpkin decor complete, you’ve crafted a centerpiece that’s bold, unique, and perfectly themed. You’ve added gears, embellishments, and a touch of Victorian charm, transforming a simple pumpkin into a work of art. You’ve embraced creativity, personalized your space, and made your Halloween unforgettable. So, keep experimenting, keep creating, and keep celebrating your style. Because in the end, your DIY decor is a reflection of your imagination, your passion, and your love for spooky, steampunk style.

btfarm Fall Decor 16.4FT 50 LED 3D Pumpkin Maple Leaf Acorn Fairy String Lights Battery Operated with Remote Timer, Thanksgiving Decorations Waterproof for Home Autumn Harvest Halloween Party
16.4 FT 50 LED 3D Pumpkin Maple Leaf Acorn String Lights: This autumn-themed string light measures 16.4 ft/5…
As an affiliate, we earn on qualifying purchases.
As an affiliate, we earn on qualifying purchases.

Gorilla Mini Hot Glue Gun Kit (Pack of 1 Mini Hot Glue Gun and 30 Sticks) – Dual Temp, Precision Nozzle, and Easy Squeeze Trigger
Dual temp: Use the right hot glue temperature for the job; Low Heat for delicate materials like floral,…
As an affiliate, we earn on qualifying purchases.
As an affiliate, we earn on qualifying purchases.