
To create a DIY steampunk lamp or lantern, start by choosing aged or distressed materials like reclaimed wood and vintage metal fittings. Incorporate exposed gears, valves, and clock parts for a mechanical look, and use Edison bulbs for warm, industrial light. Assemble the components securely, leaving some wiring and mechanical elements visible for authenticity. Focus on handcrafted details and a rugged aesthetic. Keep exploring to discover step-by-step ideas that will help you craft your own unique steampunk masterpiece.
Key Takeaways
- Gather vintage industrial materials like reclaimed wood, exposed gears, aged metal fittings, Edison bulbs, and antique-style sockets.
- Construct a sturdy base using reclaimed wood or pipe fittings, leaving mechanical parts exposed for aesthetic appeal.
- Assemble wiring safely with neat, simple runs, and attach vintage sockets and filament bulbs for warm, ambient lighting.
- Decorate with mechanical elements such as gears, valves, or clock parts, emphasizing handcrafted, distressed finishes for authenticity.
- Finalize by securing all components, ensuring safety, and adding personalized handcrafted details for a unique steampunk look.
Creating a DIY steampunk lamp is a rewarding project that lets you blend vintage industrial style with personal creativity. When you start designing your lamp, think about how you can incorporate elements that highlight a vintage design. Think exposed gears, aged metal finishes, and antique-looking bulbs that give off a warm glow. These details will instantly evoke the charm of the industrial decor style, making your lamp not just a light source but a statement piece. You want your lamp to reflect a sense of history and craftsmanship, so choose materials that look aged or distressed—copper, brass, or darkened steel are perfect options.
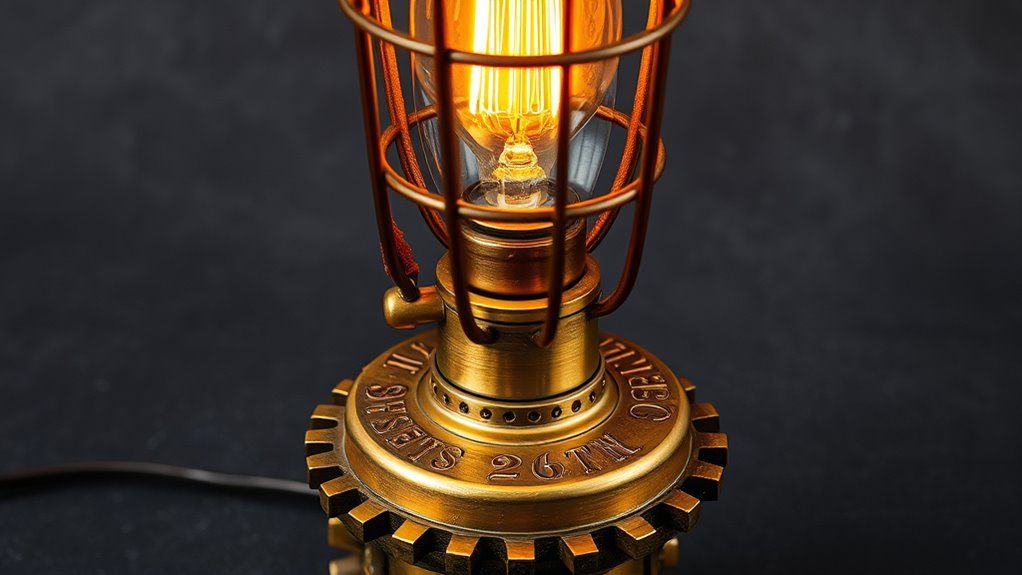
Create a vintage-inspired steampunk lamp with gears, aged metals, and warm Edison bulbs for a handcrafted industrial charm.
To begin, gather your materials: a sturdy base, such as an old pipe fitting or reclaimed wood, a vintage-style light socket, and a power cord. Accessories like small gears, valves, or clock parts can be attached to enhance the industrial decor vibe. When assembling, focus on maintaining the raw, unfinished look that characterizes steampunk design. Leave some parts exposed to showcase the mechanical elements, and keep the wiring simple but neat, so it complements the vintage aesthetic rather than detracting from it.
Lighting is key for setting the mood, so choose an Edison bulb or a filament-style bulb to emphasize the vintage design. These bulbs emit a warm, amber glow that enhances the industrial decor and makes your space feel cozy and inviting. When wiring your lamp, ensure safety precautions are in place, but don’t hide the mechanics completely—part of the steampunk appeal is celebrating the functionality of mechanical parts. Use vintage-style sockets and fittings to keep everything cohesive and authentic.
Adding decorative touches like small chains, rivets, or mini gauges can elevate your lamp from just functional to artful. Position these elements thoughtfully so they complement the overall vintage design, giving your lamp a handcrafted, personalized feel. Once assembled, place your steampunk lamp in a prominent spot where it can serve as a focal point—on a side table, a desk, or a shelf—highlighting your efforts in creating a piece that marries form and function.
This project is about more than just lighting; it’s about creating a piece that captures the essence of vintage design and industrial decor. As you work through each step, remember that imperfections and aged finishes add character. Your DIY steampunk lamp will not only brighten your space but also showcase your craftsmanship and unique style. It’s a perfect way to bring a touch of history and industrial charm into your home, all while enjoying the satisfaction of making something with your own hands.
Furthermore, understanding the importance of ethical implications in design can help ensure your project aligns with sustainable and responsible practices, adding depth to your craftsmanship.
Frequently Asked Questions
What Safety Precautions Should I Take When Working With Electrical Components?
When working with electrical components, prioritize electrical safety by unplugging devices before handling and avoiding water. Wear insulated gloves and use properly rated tools to prevent shocks. Handle tools carefully, keeping your workspace organized to avoid accidents. Always double-check connections and test circuits with a multimeter before powering up. Taking these precautions guarantees safe tool handling and minimizes risks, making your project both safer and more enjoyable.
Which Tools Are Essential for Assembling a Steampunk Lamp?
You’ll need a few essential tools to assemble your steampunk lamp successfully. Wire cutters are vital for trimming wires precisely, while a soldering iron ensures strong, secure connections. Some might worry about handling these tools safely, but with proper precautions, you’ll find they’re straightforward to use. Be certain to work in a well-ventilated area and wear safety glasses. These tools help you create a professional-looking, durable steampunk lamp.
How Can I Customize the Design for Different Room Styles?
You can customize your steampunk lamp by choosing vintage color schemes like tarnished brass or deep copper to match your room’s vibe. Incorporate industrial accents such as exposed gears, rivets, or reclaimed wood to enhance the steampunk aesthetic. Adjust the size and shape of the lamp to fit modern or traditional spaces, and add decorative elements like clock parts or vintage filament bulbs to create a unique, cohesive look that complements your room style.
Are There Eco-Friendly or Recycled Materials Suitable for This Project?
Yes, you can use recycled metals, reclaimed wood, and eco-friendly adhesives for your project. These materials reduce waste, lower environmental impact, and add a unique, vintage touch to your design. Think of incorporating salvaged gears, old pipes, or repurposed glass to create a distinctive steampunk aesthetic. By choosing eco-friendly adhesives, you guarantee your project stays sustainable while maintaining durability and style. Embrace recycling, reusing, and repurposing to craft a truly eco-conscious masterpiece.
How Long Does It Typically Take to Complete a DIY Steampunk Lamp?
It usually takes about 4 to 8 hours to complete a DIY steampunk lamp, depending on your skill level. If you’re a beginner, expect to spend more time figuring out wiring and assembly, while experienced crafters might finish faster. Your time estimation also depends on how detailed and intricate you want your lamp to be. Be patient, take your time, and enjoy the creative process!
Conclusion
Now that you’ve crafted your own steampunk lamp, you’ve added a unique touch to your space. It’s a charming way to bring a bit of vintage flair and creative spirit into your home. Remember, every detail is a reflection of your style, so enjoy the process and don’t be afraid to tweak things along the way. Your handmade lamp isn’t just a light source; it’s a cozy reminder of your inventive side.