
To make steampunk goggles, start by choosing sturdy frames such as old eyeglasses or craft materials, then attach lenses—either clear or tinted for a vintage look. Decorate with gears, cogs, and mechanical parts from craft or salvage stores, securing everything with hot glue or epoxy. Customize the frame with metallic paints and weathering techniques for an aged effect. Adding straps for comfort completes the look. Continue exploring the process to craft your unique, authentic steampunk accessory.
Key Takeaways
- Gather sturdy base frames, lenses, decorative gears, and adhesive materials for assembly.
- Shape and fit the frame comfortably using bending or cutting techniques.
- Attach lenses securely and add adjustable straps for comfort.
- Decorate with metallic paints, gears, and rivets for an authentic steampunk look.
- Finish with distressing and weathering techniques to achieve a vintage, aged appearance.
Creating your own steampunk goggles is a fun and rewarding project that lets you express your unique style. When you immerse yourself in DIY accessories, you gain the freedom to customize every detail, making your costume design truly one-of-a-kind. Building your own goggles allows you to experiment with different materials, shapes, and embellishments, guaranteeing your accessories perfectly match your personal aesthetic and the overall look you’re aiming for.
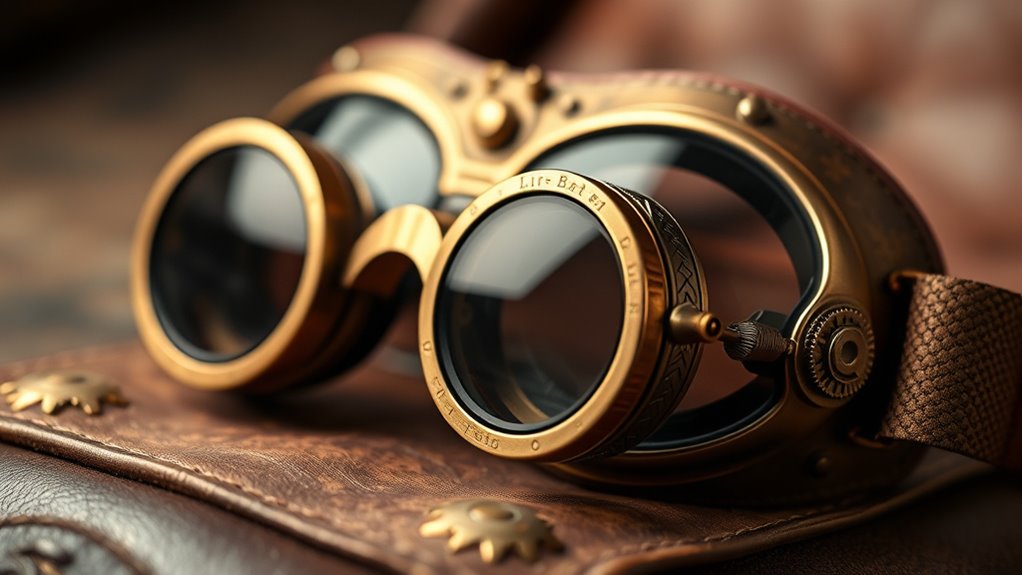
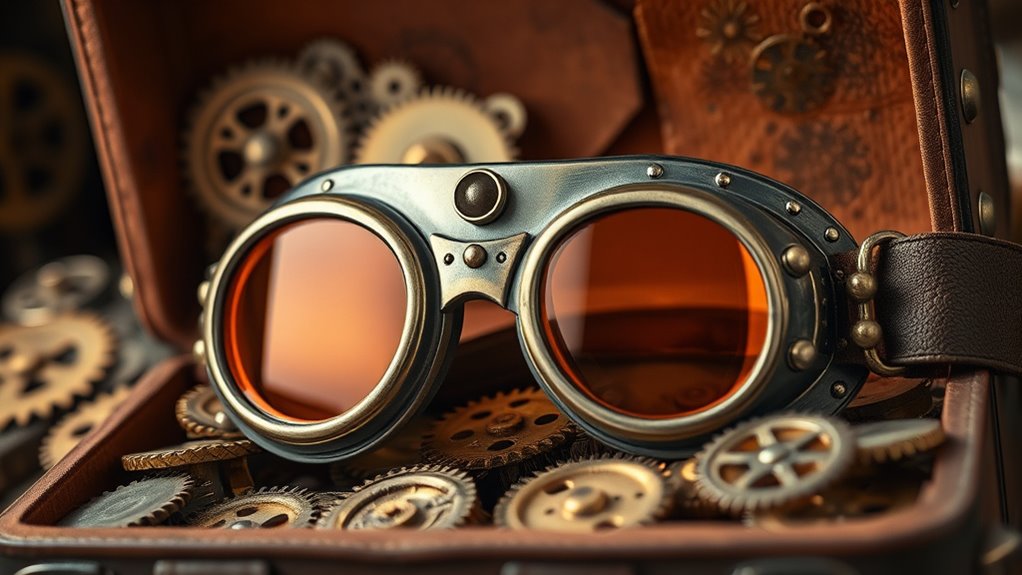
Start by gathering the essential materials. You’ll need a sturdy base for the goggles—think old eyeglass frames, plastic or metal rings, or even cutouts from craft foam. For the lenses, you can repurpose clear plastic or glass, or even tinted film to create a vintage, industrial appearance. Decorative elements like gears, cogs, pipes, and small mechanical parts are vital for that authentic steampunk vibe. You can find these at craft stores, salvage yards, or online. Don’t forget to have some strong adhesive, like hot glue or epoxy, to hold everything together securely.
As you assemble your goggles, focus on shaping the frame to fit comfortably on your head. If you’re using metal or plastic, you might need to do some cutting or bending to get the right fit. For a more intricate look, you can add embellishments like rivets, leather straps, or metallic paint to enhance the industrial aesthetic. When attaching the lenses, make sure they sit securely but don’t obstruct your vision. If you want adjustable elements, consider adding a strap or elastic band for comfort and flexibility.
Painting and finishing your goggles is an essential step to achieve that vintage, weathered look typical of steampunk style. Use metallic paints—bronze, copper, or brass are popular choices—to give your goggles an aged appearance. Sanding some areas lightly can create a distressed effect, making the accessory look well-worn and authentic. Adding small details with metallic markers or applying patina solutions can further enhance the aged, industrial feel.
Once your goggles are assembled and painted, try them on and make any necessary adjustments for comfort and fit. Remember, DIY accessories should not only look great but also be comfortable enough to wear for extended periods. The process of making your own steampunk goggles is as much about creativity as it is about craftsmanship. With patience and attention to detail, you’ll end up with a unique piece that perfectly complements your costume design and showcases your personal style. Creating these goggles isn’t just about assembling parts; it’s about crafting an accessory that tells your story and elevates your overall look.

Crayola Construction Paper Bulk Pack (480 Sheets) – 10 Assorted Colors, 9x12, Teacher School Supplies & Classroom Must Haves, Card Making Craft Supplies, Art Paper
- Bulk Pack of 480 Sheets: Includes 48 pages per color
- Assorted 10 Colors: Bright, varied colors for projects
- Ideal for Classroom Use: Perfect for school projects and crafts
As an affiliate, we earn on qualifying purchases.
Frequently Asked Questions
What Tools Are Essential for Making Steampunk Goggles?
Did you know that 85% of steampunk enthusiasts craft their accessories at home? To make steampunk goggles, you’ll need essential tools like a drill for attaching decorative gears and a leather hole punch for crafting leather straps. Pliers help secure small parts, while scissors cut leather or fabric. A hot glue gun provides strong adhesion, making these tools indispensable for creating detailed, durable goggles.
How Do I Customize Goggles for Comfort?
You customize your goggles for comfort by adding ergonomic padding to the inner frames, ensuring they sit gently on your face. Adjust the straps to fit snugly but not too tight, using the adjustable mechanisms to find your perfect fit. This way, you’ll enjoy the steampunk aesthetic while maintaining comfort during extended wear. Prioritizing ergonomic padding and adjustable straps makes your goggles uniquely suited to you.
Can I Use Recycled Materials for the Frames?
Yes, you can definitely use recycled materials for the frames to add a unique, eco-friendly touch to your steampunk goggles. Items like old watch parts, metal scraps, or vintage jewelry can be repurposed for frame customization. Just make sure the materials are sturdy enough to hold the lenses securely and comfortably. With some creativity and basic tools, you’ll create a one-of-a-kind pair that reflects your style and sustainable values.
What Lighting Options Work Best for Steampunk Goggles?
Think of your goggles as a lighthouse guiding explorers through foggy nights. LED lighting works best, offering bright, energy-efficient illumination that adds a vintage glow. Choose battery options like small, rechargeable packs or coin cells for a sleek, unobtrusive look. These lights symbolize innovation and adventure, giving your goggles a steampunk edge while ensuring you can see clearly in dim environments.
How Do I Ensure Durability for Outdoor Wear?
To guarantee your steampunk goggles are durable for outdoor wear, focus on selecting sturdy materials like brass or treated leather. Use weatherproofing techniques such as sealing joints and applying protective coatings to resist moisture and corrosion. Regularly check for wear and tear, and reapply weatherproofing as needed. This approach keeps your goggles resilient against the elements, so you can enjoy your adventures without worry.

Elmer's All Purpose School Glue Sticks, Acid-Free and Washable, Clear, 7 Grams, 30 Count - Craft Projects, Poster, Classroom Supplies, #1 Teacher Brand
- Versatile Bonding: Bonds paper, cardboard, foam, and more
- Safe and Washable: Non-toxic, acid-free, washable, photo safe
- Smooth Application: Applies smoothly without clumps
As an affiliate, we earn on qualifying purchases.
Conclusion
Creating your own steampunk goggles is a fun way to express your creativity and unique style. Did you know that the steampunk accessory market grew by 35% last year? That means more people than ever are embracing this inventive, vintage-inspired look. So, whether you’re crafting for a costume or just for fun, your customized goggles will stand out and showcase your flair. Immerse yourself, get creative, and enjoy bringing your steampunk vision to life!

Caliart 176PCS Art Supplies Sketching Kit, 100 Sheets 3-Color Sketch Book
- Complete Artist Drawing Set: Includes 176 pieces for all skill levels
- Versatile Drawing Tools: Pencils, charcoal, watercolor, metallic, and blending tools
- Premium Quality Supplies: Pre-sharpened pencils and durable accessories
As an affiliate, we earn on qualifying purchases.

Crayola Colored Pencils (36ct), Teacher School Supplies for Kids & Adults, Preschool Classroom Must Haves, Coloring Gift, Ages 3+
- Number of Pencils: 36 colored pencils
- Suitable for Kids: Perfect for children ages 3+
- Creative Expression: Encourages artistic potential
As an affiliate, we earn on qualifying purchases.