Start by creating a sturdy, lightweight frame using foam or cardboard shaped into a backpack. Attach vintage accessories like brass gears, clock parts, and pipes with strong adhesive, arranging larger pieces for prominence and smaller details for depth. Paint everything with metallic tones, then weather to add age and authenticity. Secure all components well, add straps for wearability, and consider small details like rivets or LED lights. Keep experimenting with placement to achieve a balanced, authentic steampunk look—if you keep exploring, you’ll master the craft.
Key Takeaways
- Construct a lightweight, sturdy frame using foam, cardboard, or thin wood to form the backpack’s base shape.
- Attach vintage and mechanical components with strong adhesive, arranging larger pieces for visual prominence.
- Paint with metallic tones, then weather with washes and dry brushing to achieve an aged, industrial look.
- Add small details like rivets, screws, and patinas to enhance authenticity and depth.
- Secure all elements firmly, include support straps, and consider lighting or gauges for functional, detailed effects.
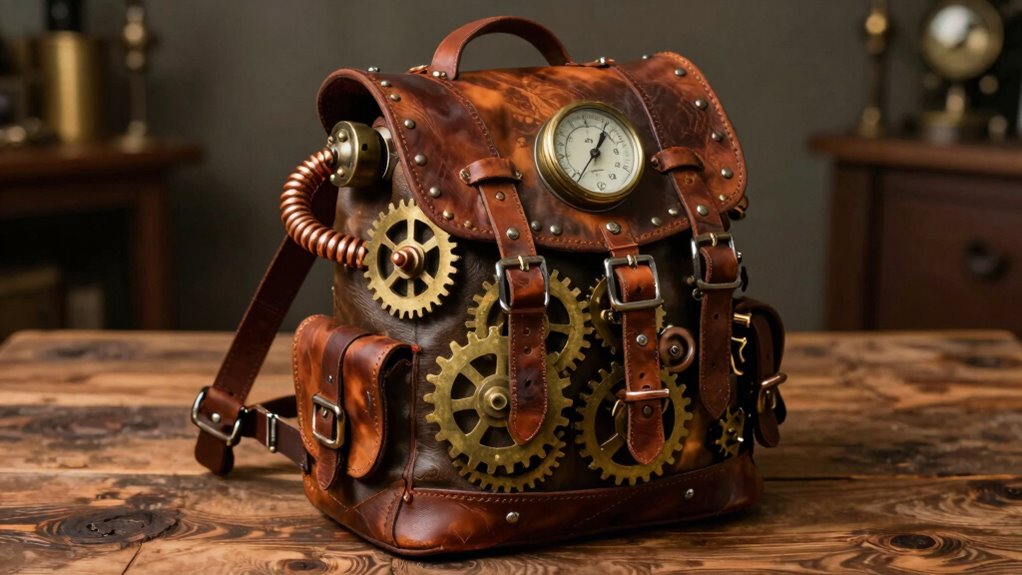
Creating a steampunk backpack prop is a fun and rewarding project that allows you to showcase your creativity and craftsmanship. To start, gather your materials, focusing on vintage accessories and mechanical components that give the piece an authentic, aged look. Vintage accessories like brass gears, small clock parts, and antique-looking keys add a touch of history and charm, making your backpack stand out. Mechanical components, such as miniature pistons, pipes, and cogs, are essential for achieving that industrial steampunk aesthetic. These items can often be found at thrift stores, salvage yards, or online marketplaces, so take your time searching for pieces that fit your vision.
Begin by designing the basic structure of your backpack using foam, cardboard, or lightweight wood. This foundation serves as the frame, so make certain it’s sturdy enough to support the added mechanical details. Once the base is ready, attach the vintage accessories and mechanical components with strong adhesive, like hot glue or epoxy. When affixing these items, think about symmetry and placement to create a balanced, visually appealing design. For example, place larger gears or pipes on the main body and smaller details around them to add depth and complexity. Incorporating design principles can help ensure your prop looks cohesive and professional.
Painting is an essential step in elevating your backpack’s steampunk look. Use metallic paints—brass, copper, or gunmetal—to give the mechanical parts an authentic aged appearance. You can also add weathering effects with darker washes or dry brushing to create a sense of wear and tear, making your prop look like it’s been through adventures. For the vintage accessories, consider using antique finishes or patinas to enhance their old-world charm. If you want a more complex look, incorporate small LED lights or gauges to mimic steam or pressure systems, adding a functional and futuristic element. Additionally, applying color techniques can help bring realism and depth to your finished piece.
Finally, assemble everything onto your backpack frame, ensuring all mechanical components are securely attached and balanced. Adjust straps or add extra support if needed, so your finished prop is comfortable to wear and durable enough for cosplay or display. Throughout the process, pay attention to details—small touches like rivets, bolts, and decorative screws can greatly enhance the authenticity of your steampunk backpack. Incorporating vintage accessories and mechanical components is crucial for achieving that authentic industrial steampunk aesthetic. With patience and creativity, you’ll craft a unique accessory that perfectly captures the essence of steampunk style, combining vintage charm with mechanical ingenuity.

FodPand Cool Steampunk Gears Laptop Bag 17 Inch Back Pack Travel Backpack Sports Work Backpacks Teacher Bookbag
Lots of storage space&pockets: Cool Steampunk Gears Work bag one separate laptop compartment hold 15.6 inch laptop as…
As an affiliate, we earn on qualifying purchases.
As an affiliate, we earn on qualifying purchases.
Frequently Asked Questions
What Materials Are Best for Lightweight Steampunk Backpack Props?
For lightweight steampunk backpack props, you’ll want to choose materials like vintage gears made from lightweight plastic or painted metal to add authenticity without weight. Leather straps provide a sturdy yet flexible way to secure parts. Use foam or lightweight wood for structural elements to keep the backpack comfortable to wear. Combining these materials helps you achieve an authentic steampunk look while keeping the entire piece manageable and easy to wear.
How Do I Ensure Durability for Outdoor Events?
To guarantee durability for outdoor events, you should apply a weatherproof coating to protect your steampunk backpack from rain and wind. Reinforced stitching is also essential; double-stitch seams to prevent tearing during active use. Regularly inspect for wear and tear, and touch up the weatherproof coating as needed. By combining weatherproofing and reinforced stitching, your prop stays sturdy and looks great, no matter the weather conditions.
Can I Customize the Design for Different Steampunk Themes?
Did you know that over 60% of steampunk enthusiasts enjoy customizing their props to match their unique style? You can absolutely customize your backpack for different steampunk themes by altering color schemes, adding specific gear elements, or incorporating vintage accessories. Prop customization allows you to personalize your steampunk fashion and make each piece truly distinct, ensuring your backpack complements any theme you choose—whether Victorian, industrial, or Victorian-meets-futuristic.
What Safety Precautions Should I Take During Construction?
You should always wear safety gear, like goggles and gloves, to protect yourself from sharp edges and debris. When using power tools, make sure they’re in good condition, and keep your workspace clean to prevent accidents. Read all safety instructions before operating tools, and avoid distractions. Taking these precautions helps prevent injuries and ensures a safer building process as you craft your steampunk backpack prop.
How Long Does It Typically Take to Build a Full Prop?
Building a full steampunk backpack prop generally takes 20 to 40 hours, depending on your experience and complexity. You’ll spend time researching historical influences to achieve authentic details, and carefully crafting mechanical details like gears, pipes, and gauges. Your pace may vary based on your skill level and available tools. Take your time to guarantee precision, and don’t rush the process—attention to detail makes your prop truly stand out.

BigOtters 150Pcs Steampunk Gear Charms for DIY Jewelry Making, Metal Cogwheel Pendants in 5 Colors, Assorted Vintage Gears for Resin Crafts, Scrapbooking, Cosplay Accessories and Decorative Projects
Made for Creative Craft Projects:Bring vintage mechanical style to your handmade projects with assorted steampunk gear charms. These…
As an affiliate, we earn on qualifying purchases.
As an affiliate, we earn on qualifying purchases.
Conclusion
Now that you’ve crafted your steampunk backpack, you’re ready to turn heads at any cosplay event or costume party. Remember, blending Victorian elegance with futuristic flair creates a truly unique piece—just like a time traveler from 1887 might have imagined. With your creativity and a few gears, you’ve built more than a prop; you’ve made a statement. So, strap it on, and let your steampunk adventure begin—because who knows when you’ll need a pocket watch or a ray gun!

Prop And Scenery Lights 5 Pack Black Light Micro Effects Light 405nm Violet LED Mini Blacklight with 9V Battery Clip for Props Scenery Fluorescent Paints Theatrical Costumes UV Glow Inks
This miniature black light LED emits at a wavelength of 405 nm, which is a visible violet light….
As an affiliate, we earn on qualifying purchases.
As an affiliate, we earn on qualifying purchases.

Vallejo – Pigment FX Rust & Corrosion Effects, Weathering Pigments for Models & Dioramas, 4 Bottles x 35 ml (1.18 Fl. Oz.)
REALISTIC WEATHERING: Natural and synthetic pigments designed for mud, sand, dust, and climate effects on models and dioramas
As an affiliate, we earn on qualifying purchases.
As an affiliate, we earn on qualifying purchases.