To create DIY steampunk mechanical wings, start by designing a lightweight yet sturdy frame using aluminum or wire, ensuring it’s both functional and visually striking. Add vintage accessories like leather straps, brass fittings, and Victorian embellishments for authenticity. Incorporate hidden motors, pulleys, or pneumatics to simulate steam-powered movement, and paint the wings in metallic tones like bronze or copper. Pay close attention to joints and details for smooth operation and authentic steampunk flair. Keep exploring for detailed steps and tips.
Key Takeaways
- Use lightweight, sturdy materials like aluminum or wires to build a balanced, functional steampunk wing framework.
- Incorporate vintage accessories such as brass fittings, gears, and Victorian embellishments for authentic steampunk aesthetics.
- Integrate hidden motors, pulleys, or pneumatics to simulate steam-powered movement with reliable, seamless operation.
- Paint wings with metallic tones like bronze or copper, and add intricate vintage details for visual appeal.
- Test and refine mechanisms for smooth movement and secure attachment of all vintage-inspired components.

Ever wondered how to bring steampunk fantasy to life with your own hands? Creating DIY steampunk mechanical wings is an exciting project that combines creativity, engineering, and vintage style. To start, you’ll want to focus on designing a framework that feels both functional and fantastical. Think about using lightweight materials like aluminum or sturdy wires to craft the skeletal structure. This base will support the steam-powered mechanisms that animate your wings, so guarantee it’s strong enough to handle the movement. Once you have the frame, you can start adding vintage costume accessories—think leather straps, brass fittings, and rivets—that give your wings that authentic steampunk look. These details not only add visual appeal but also serve as mounting points for your mechanisms.
The core of your project involves integrating steam-powered mechanisms that will give your wings a real sense of movement. While actual steam engines might be complex, you can simulate the effect using hidden motors, pneumatics, or even lightweight pulleys. The key is to make these mechanisms appear as if they’re powered by steam, so dressing up your components with vintage fittings, gauges, and pipes will help achieve that look. You might also consider using small, battery-operated motors disguised with brass casings or antique-looking valves. These elements contribute to the illusion of steam-powered technology and make your wings seem like they’re straight out of a Jules Verne novel.
As you assemble your wings, pay close attention to the joints and hinges. These should be sturdy enough to allow for smooth movement while maintaining the aesthetic. Vintage costume accessories—such as gear-shaped charms, clock parts, or Victorian-style embellishments—can be attached to hinges or along the framework to enhance the steampunk vibe. Painting your wings with metallic tones like bronze, copper, or tarnished silver will further reinforce the vintage, industrial feel. Remember, the beauty of steampunk design lies in its mix of the old and the new, so don’t hesitate to incorporate repurposed found objects or intricate details to make your wings uniquely yours.
Finally, test your wings carefully. Make sure all steam-powered mechanisms move seamlessly and that the vintage accessories stay securely attached. With patience and creativity, you’ll craft a pair of mechanical wings that look stunning and feel like they could take flight in a Victorian steampunk universe. This project isn’t just about building; it’s about transforming your imagination into a wearable, mechanical marvel.
Frequently Asked Questions
What Safety Precautions Are Necessary During Assembly?
You should always wear safety gear like goggles and gloves during assembly to protect your eyes and hands. Make certain your assembly workspace is well-ventilated, clean, and free of clutter to prevent accidents. Use proper tools and follow instructions carefully to avoid injury. Keep your workspace organized, and be cautious around sharp or moving parts. Taking these precautions helps keep you safe while working on your steampunk wings.
Can These Wings Be Powered Electronically?
Yes, you can power these wings electronically to enhance their aesthetic appeal and achieve historical accuracy. By integrating small motors or servos, you activate animated movements that captivate crowds. Just guarantee safety and synchronization during setup, and select power sources that suit your design. This electrification elevates the experience, transforming static wings into stunning steampunk sculptures that seamlessly blend vintage craftsmanship with modern mechanics.
What Materials Are Best for Lightweight Construction?
For lightweight construction, you should prioritize lightweight metals like aluminum or titanium, which offer strength without adding much weight. Durable plastics such as ABS or polycarbonate are also excellent options, providing flexibility and resilience. Combining these materials allows you to create wings that are sturdy yet lightweight, making them easier to wear and maneuver. Choose the right balance based on your design needs, ensuring durability without sacrificing comfort or mobility.
How Long Does It Take to Build a Pair?
Building a pair of steampunk mechanical wings typically takes about 20 to 40 hours, depending on your experience and project complexity. You’ll start by assembling the wing frame, ensuring it’s sturdy yet lightweight. Then, you attach decorative gears and other steampunk details, which can add extra time for precise placement. Planning carefully and working steadily helps you complete your wings faster and achieve a polished, authentic look.
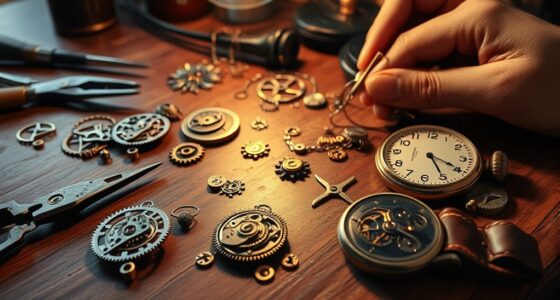
Are There Recommended Tools for Detailed Parts?
For detailed parts, you’ll want precision tools like a precision drill for small, accurate holes and fine sanding tools to smooth intricate surfaces. For example, I once crafted a steampunk gear and used a precision drill to guarantee perfect fit, then finished with fine sanding to achieve a polished look. These tools help you work with accuracy and finesse, making your wings more realistic and functional.
Conclusion
Building your own steampunk mechanical wings isn’t just a fun project—it’s a way to unleash your creativity. Did you know that over 65% of DIY enthusiasts say their projects boost confidence and problem-solving skills? By combining vintage aesthetics with modern craftsmanship, you’re creating something truly unique. So, keep experimenting and refining your design. With patience and passion, you’ll master the art of steampunk wings and make your imaginative ideas soar—literally and figuratively!