
To create a DIY steampunk light switch plate, start by turning off the power and removing the existing cover. Clean the switch plate thoroughly, then sketch your vintage-inspired design, incorporating gears, clock parts, and metal accents. Attach these elements with strong glue, ensuring they don’t interfere with switch operation. Once dried, reinstall the plate, restore power, and test the switch. If you want detailed steps and tips, continue exploring how to craft this unique vintage decor piece.
Key Takeaways
- Turn off power, verify circuit is dead, and use insulated tools before beginning the project.
- Clean the plain switch plate thoroughly and plan your vintage steampunk design layout beforehand.
- Attach gears, clock parts, and embellishments securely with hot glue or strong adhesive, ensuring they don’t obstruct switch operation.
- Reinstall the decorated switch plate, restore power, and test the switch for smooth, safe functionality.
- Prioritize electrical safety throughout the project, double-check connections, and confirm no safety hazards remain.

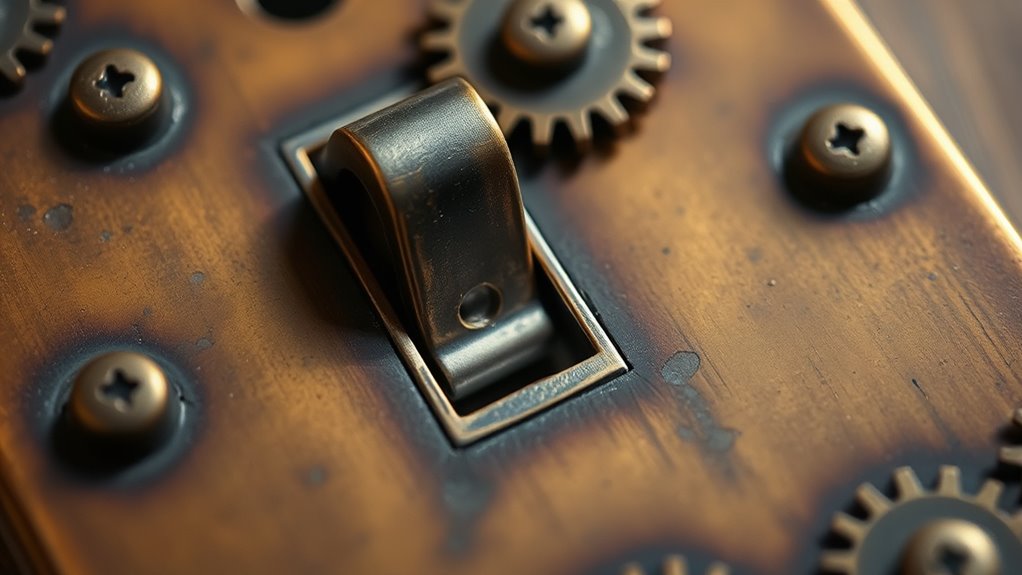
Ever wondered how to add a unique, vintage touch to your home decor? Creating a DIY steampunk light switch plate is a fantastic way to do just that. Steampunk design blends Victorian elegance with industrial elements, giving your space a timeless, vintage aesthetic that stands out. Before diving into your project, it’s essential to prioritize electrical safety. Working with electrical components can be dangerous if you’re not careful, so always turn off the power at the breaker box and verify that the circuit is dead before handling any wiring. Using insulated tools and double-checking connections will help guarantee your safety and the longevity of your creation.
Prioritize electrical safety by turning off power and verifying circuits before customizing your steampunk switch plate.
To start, gather your materials. You’ll need a plain switch plate, vintage-looking gears, clock parts, metal embellishments, and a strong adhesive or hot glue gun. For a more authentic vintage aesthetic, consider sourcing items like tarnished brass or copper accents, which add an aged, industrial feel. You might also want to include small vintage clock faces or antique keys to enhance the steampunk vibe. Before attaching any decorative elements, clean the switch plate thoroughly to remove dust and oils that could prevent adhesion. Once clean, sketch out your design to plan where each piece will go, creating a visually appealing layout that complements your decor.
When attaching the decorative pieces, be cautious to avoid interfering with the switch mechanism or the electrical components underneath. Use a small amount of glue to secure each element, pressing firmly and allowing sufficient drying time. Make sure that none of the embellishments obstruct the switch or the surrounding area, which could hinder operation or cause safety issues. Remember, the goal is to assure electrical safety while enhancing the vintage aesthetics of your space. If you’re unsure about how your modifications might impact the switch’s function or safety, consult an electrician for advice.
Finally, once everything is securely in place and fully dried, reinstall the switch plate onto the wall, restoring power and testing the switch to ensure it operates smoothly. A well-crafted steampunk light switch plate not only upgrades your home’s look but also becomes a conversation piece that showcases your creativity. With attention to detail and safety, you can transform a simple fixture into a vintage-inspired masterpiece that blends functionality with style. Just stay cautious during installation, and enjoy the satisfaction of a unique, personalized home decor upgrade that perfectly captures the steampunk aesthetic.
Frequently Asked Questions
Can I Customize the Design for Different Light Switch Types?
Yes, you can customize the design for different switch plate styles. When doing design customization, consider the specific switch type and its size to guarantee a perfect fit. You might need to modify your steampunk elements or add new details to match various styles. Using versatile materials and adaptable templates makes it easier to create unique switch plates for different light switch types, giving your space a personalized, cohesive look.
What Safety Precautions Should I Follow During Installation?
Think of electrical safety and tool safety as your armor when installing your light switch plate. You should always turn off the power at the breaker box before starting, ensuring no current flows. Use insulated tools to prevent shocks, and double-check that your hands are dry. Wear safety goggles to protect your eyes from debris. Following these precautions keeps you safe, making your project a smooth, worry-free adventure.
How Long Does the Project Typically Take?
The project typically takes about 2 to 4 hours, depending on your skill level and how intricate your design is. If you’re experienced with DIY projects and electrical work, you’ll likely finish faster. For beginners, it’s wise to allocate extra time for patience and careful assembly. Keep in mind, a clear project timeline helps you stay organized, ensuring safe and efficient completion of your steampunk light switch plate.
Are There Eco-Friendly Materials I Can Use?
Of course, you can make your steampunk switch plate eco-friendly—because who wouldn’t want to save the planet while crafting vintage charm? You should use recycled metals for a rugged, authentic look, and biodegradable paints for a finish that’s kind to Mother Earth. These materials not only add character but also guarantee your project’s sustainability. After all, even steampunk deserves a little green ingenuity.
Can This Project Be Done Without Prior Crafting Experience?
Yes, you can definitely do this project without prior crafting experience. Focus on learning basic crafting skills and follow safety guidelines to avoid accidents. Gather simple tools, watch tutorials, and take your time. With patience and attention to safety, you’ll enjoy creating your steampunk light switch plate, even as a beginner. Remember, practice makes perfect, and safety always comes first!
Conclusion
Now that you’ve crafted your steampunk light switch plate, it’s like giving your space a vintage charm with a modern twist. Your DIY project isn’t just a switch cover; it’s a statement piece that brings steampunk dreams to life. With your hands and a bit of creativity, you’ve turned a simple item into a work of art. Keep experimenting and let your imagination be the engine that drives your unique style forward!