To create DIY steampunk Christmas ornaments, gather vintage gears, clock parts, and metallic embellishments like rivets and keys. Attach these to glass or plastic baubles with hot glue, then paint them in metallic or muted tones like bronze, copper, or green. Add faux rust or patina for an aged look. Mix textures and finishes for a handcrafted, industrial charm. Keep exploring to discover detailed tips and ideas to make your ornaments truly unique.
Key Takeaways
- Use clear glass or plastic baubles as ornament bases, decorating with vintage gears, clock parts, and metal embellishments.
- Attach metal components with strong adhesive or hot glue, ensuring secure placement and a cohesive industrial look.
- Paint ornament bases in metallic shades like brass, copper, or rust, and add faux patina for a vintage, aged effect.
- Personalize ornaments with tiny clock faces, miniature goggles, vintage keys, and other unique metallic details.
- Finish by sealing ornaments for durability, combining textures and finishes for a handcrafted, nostalgic steampunk style.
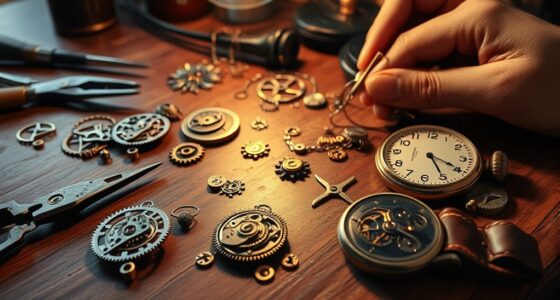
If you’re looking to add a unique, vintage touch to your holiday decor, DIY steampunk Christmas ornaments are a perfect choice. These ornaments blend industrial charm with festive cheer, giving your tree a distinctive, handcrafted appeal. To start, focus on incorporating vintage gear and metal embellishments, which are core elements of steampunk design. Vintage gears, with their intricate cogs and wheels, evoke a sense of mechanical history and add a layered, textured look that’s both eye-catching and nostalgic. You can find these gears at antique shops, salvage yards, or online marketplaces. Once you have your vintage gears, you can attach them to clear or painted ornaments to create a focal point that’s both industrial and elegant.
Metal embellishments are essential for achieving that authentic steampunk aesthetic, so gather various small metal parts like clock hands, rivets, or small metal flowers. These pieces can be affixed to the ornaments with hot glue or strong adhesive to add depth and shine. Mixing different metal finishes—antique brass, copper, or silver—can enhance the vintage vibe and make each ornament stand out. You might also consider adding small chains, keys, or screws for extra texture and visual interest. The key is to curate a collection of metallic accents that feel aged and industrial, giving your ornaments a cohesive, vintage-inspired look.
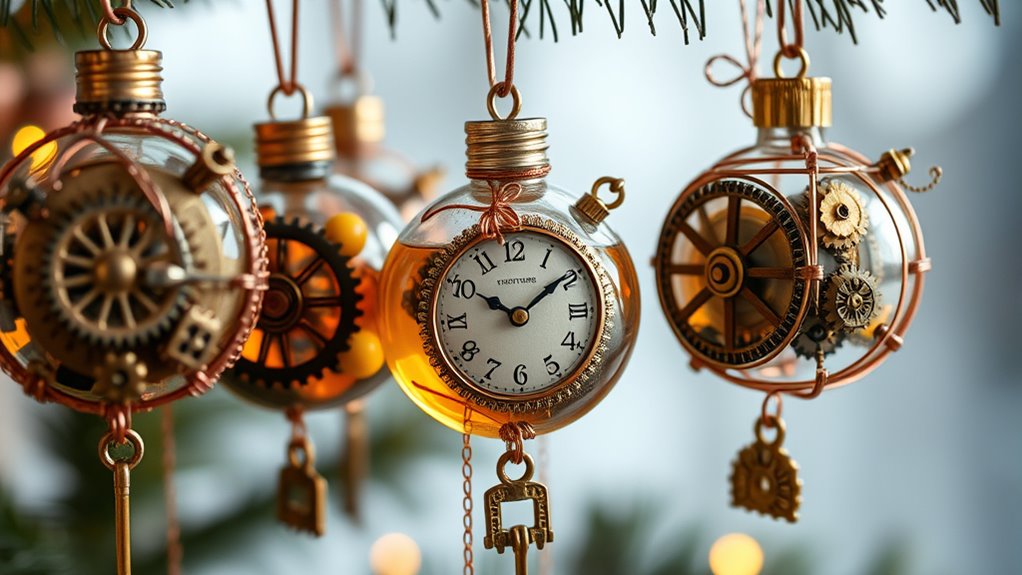
When assembling your ornaments, think about using clear glass or plastic baubles as a base, which allows your metal embellishments and vintage gears to shine. You can paint the bases in metallic shades or muted tones like rust, bronze, or deep green to complement the steampunk theme. To give your ornaments a more polished finish, consider sealing the metal parts with a clear sealer to prevent tarnishing or corrosion over time. Adding a touch of faux patina or rust effect can also amplify the vintage aesthetic, making your ornaments look like they’ve traveled through time.
Finally, don’t forget to personalize each piece by incorporating small details that reflect your style. You might add tiny clock faces, miniature goggles, or tiny vintage keys to make each ornament unique. The beauty of DIY steampunk ornaments lies in their handcrafted, imperfect charm. With vintage gear and metal embellishments, you can craft a collection that’s truly one-of-a-kind, turning your holiday decorating into an engaging creative project that celebrates both craftsmanship and nostalgia.
Frequently Asked Questions
What Are the Best Materials for Steampunk Ornament Bases?
You should use sturdy materials like metal or thick cardboard as bases for your steampunk ornaments. Vintage gears add authentic detail, so incorporate those for a true steampunk vibe. Metallic paints help create a shiny, industrial look, making your ornaments stand out. These materials are durable and easy to work with, ensuring your finished pieces look professional. With vintage gears and metallic paints, your steampunk ornaments will truly shine.
How Do I Make Ornaments Lightweight but Durable?
To make your ornaments lightweight yet durable, you should use lightweight metals like aluminum or tin for the bases, as they’re sturdy without adding bulk. Incorporate durable plastics, such as acrylic or ABS, for decorative elements, which offer strength without weight. You can also reinforce fragile parts with metal or plastic fittings, ensuring your ornaments stay intact during handling and display. This combo keeps your steampunk creations both light and long-lasting.
Can I Customize Ornaments for Different Christmas Themes?
Yes, you can customize ornaments for different Christmas themes by exploring various personalization options. Incorporate themed design ideas like colors, motifs, and embellishments that match your chosen style, whether it’s rustic, elegant, or whimsical. Use paint, decals, or small charms to add personal touches. This way, you create unique ornaments that reflect your holiday spirit and seamlessly fit into any Christmas decor theme you prefer.
How Long Do Steampunk Ornaments Typically Last?
Steampunk ornaments can last as long as treasured memories, often several holiday seasons, if you care for them properly. Their longevity depends on your preservation techniques—using airtight containers, gentle cleaning, and avoiding direct sunlight helps prevent tarnishing and damage. With proper care, these intricate, vintage-inspired decorations can become heirlooms, evoking nostalgia like a well-worn book that’s cherished for generations.
Are There Eco-Friendly Options for Steampunk Ornament Supplies?
Yes, you can choose eco-friendly options for your steampunk ornament supplies. Look for recycled materials like metal gears, clock parts, and vintage jewelry to give your ornaments a sustainable touch. Biodegradable options, such as natural adhesives and eco-friendly paints, also help reduce environmental impact. By selecting these alternatives, you create unique, stylish decorations while supporting eco-conscious practices, making your holiday crafts both creative and environmentally responsible.
Conclusion
Now that you know how to create DIY steampunk Christmas ornaments, you’re ready to craft unique decorations that stand out. Did you know that personalized ornaments can increase holiday cheer and create lasting memories? By adding vintage gears and metallic accents, you’ll give your tree a one-of-a-kind steampunk flair. So, gather your supplies and start crafting—your holiday decor will be the talk of the season, making this Christmas truly unforgettable!