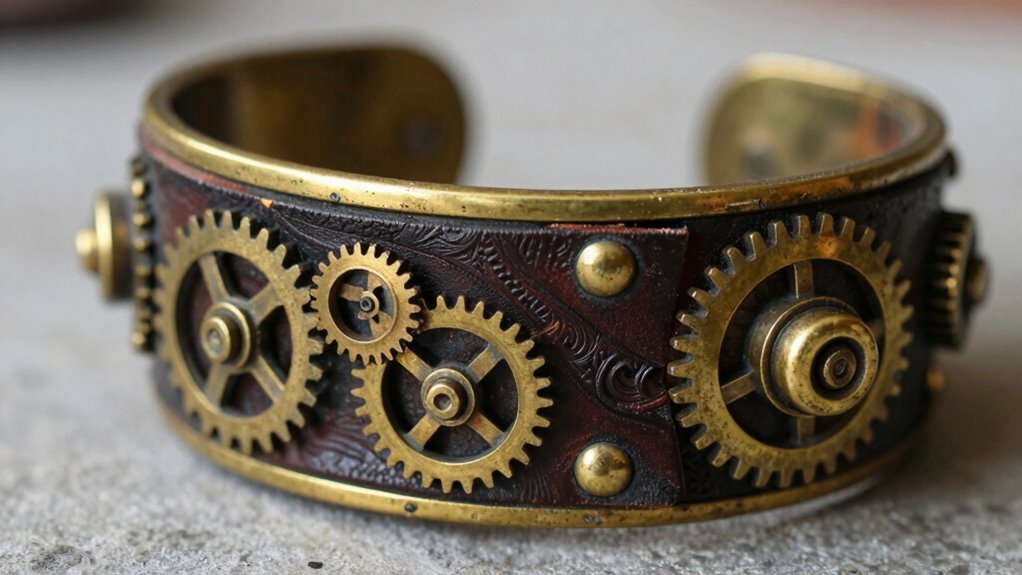

To create a DIY steampunk cuff bracelet with layered details, start with a sturdy leather or metal base for structure. Attach vintage machinery elements like gears, cogs, and watch parts to add intricate, layered depth. Incorporate industrial hardware such as rivets, screws, or studs for texture and strength. Enhance your design with decorative touches like chains or tiny glass vials. By following these steps, you’ll craft a unique piece that combines craftsmanship and industrial charm—discover how to perfect your design next.
Key Takeaways
- Select a sturdy leather or metal base to establish structure and vintage appeal for your cuff bracelet.
- Layer vintage gears, cogs, and watch parts to create intricate, mechanical depth.
- Attach industrial hardware like rivets, screws, or studs to enhance the industrial aesthetic.
- Incorporate decorative elements such as chains or miniature glass vials filled with tiny gears.
- Experiment with material combinations and placement to achieve a balanced, layered steampunk design.
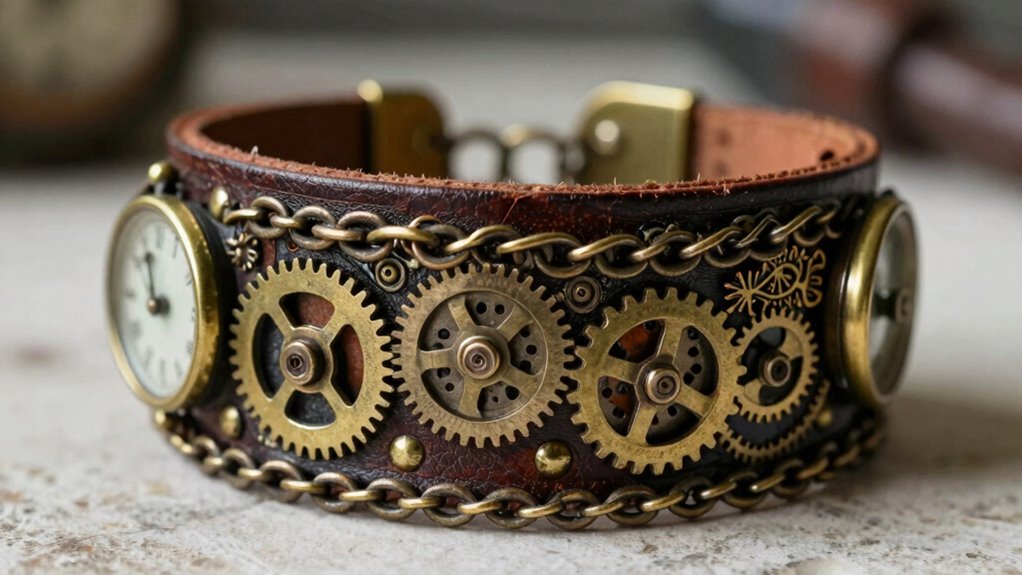
If you’re drawn to the intricate, vintage-inspired style of steampunk fashion, creating your own cuff bracelets is a rewarding way to express your unique taste. The key to capturing that authentic steampunk look lies in embracing vintage machinery and industrial design elements. By layering different textures and components, you can craft a cuff that feels both mechanical and artistic, reflecting the essence of this style.
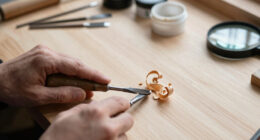
Start with a sturdy base, such as a leather or metal cuff, which provides structure and a vintage feel. Leather can be distressed or aged to give it a worn, industrial look, perfectly complementing the other elements. Once you’ve chosen your base, think about layering details that evoke the mechanical world of vintage machinery. Small gears, cogs, and watch parts are classic steampunk motifs, and they instantly add a sense of history and craftsmanship. You can source these from old watches, jewelry findings, or craft stores specializing in vintage components.
Start with a sturdy leather or metal cuff, distressed for a vintage, industrial look.
To incorporate industrial design, consider using metal embellishments like rivets, screws, or metallic studs. These details not only enhance the mechanical aesthetic but also add texture and dimension. Attach them securely with strong adhesive or small rivets, ensuring they stay in place through wear. For a layered effect, arrange your vintage machinery pieces in a way that creates depth—overlapping gears and cogs can give your cuff a complex, layered appearance, reminiscent of the inner workings of a bygone factory or steam-powered machine.
Adding small, decorative elements like chains or tiny glass vials filled with miniature gears can further elevate your design. These little touches bring a sense of narrative and craftsmanship, making your cuff more than just an accessory. Be mindful of balance; layer your details thoughtfully so that the cuff isn’t too crowded but still rich in visual interest. Play around with placement before permanently attaching your pieces, so you achieve a harmonious design. Incorporating vintage machinery and industrial materials can help you achieve a truly authentic steampunk aesthetic.
Furthermore, exploring industrial design elements can inspire innovative ways to combine functionality and artistry in your bracelet design. Paying attention to material choices is essential for creating a durable and cohesive piece that embodies the steampunk ethos. When you wear your finished cuff, you’ll carry a piece of that steampunk universe—an intricate, layered homage to vintage machinery and industrial artistry. With patience and creativity, you’ll craft a unique accessory that perfectly captures the complex beauty of steampunk style.
steampunk cuff bracelet kit
As an affiliate, we earn on qualifying purchases.
As an affiliate, we earn on qualifying purchases.
Frequently Asked Questions
What Materials Are Safest for Sensitive Skin?
You should use hypoallergenic metals like surgical steel, titanium, or sterling silver for sensitive skin. These materials are less likely to cause irritation. Also, opt for skin-safe adhesives, such as medical-grade glue, to avoid allergic reactions. Always test a small area first and choose materials labeled as hypoallergenic. This way, you can enjoy your DIY steampunk cuff bracelets without worry about skin sensitivities or irritation.
How Long Does It Take to Make a Cuff Bracelet?
It typically takes you about 2-4 hours to make a cuff bracelet, depending on your design complexity. You’ll want to start by selecting vintage embellishments and applying metal patinas for that authentic steampunk look. As you layer details and attach components, take your time to make sure everything is secure. Patience is key, but with your creativity, you’ll have a stunning cuff ready to wear in just a few hours.
Can I Customize the Design Easily?
Yes, you can easily customize the design of your cuff bracelet. You can add vintage embellishments to give it a unique, aged look, or incorporate leather customization for a personalized touch. By choosing different embellishments and adjusting leather elements, you control the style and details. This flexibility makes it simple to create a cuff bracelet that matches your aesthetic, whether vintage-inspired or modern steampunk.
What Tools Are Essential for Beginners?
Imagine vintage embellishments and metal stamping, blending old-world charm with creative expression. As a beginner, you’ll need basic tools like a metal ruler, craft scissors, and pliers to handle the hardware. A metal stamping kit helps add personalized designs, while adhesive and small screwdrivers assist in attaching vintage pieces. These essential tools make it easier to create layered steampunk cuffs, letting you craft with confidence and style from the very start.
How Do I Repair or Restore Damaged Cuffs?
To repair or restore damaged cuffs, start with cuff restoration by carefully cleaning the surface. Use a strong adhesive or metal glue to fix broken or detached layered details. For dents or bends, gently reshape the metal with pliers, ensuring not to damage the finish. If paint or embellishments are chipped, touch them up with matching paint or decorative elements. Patience and precision are key to achieving a seamless damage repair.
vintage gear jewelry findings
As an affiliate, we earn on qualifying purchases.
As an affiliate, we earn on qualifying purchases.
Conclusion
As you slip on your handcrafted steampunk cuff, you’ve woven a tapestry of gears and vintage charm that whispers tales of innovation and artistry. This accessory isn’t just jewelry; it’s a steampunk symphony etched onto your wrist, a masterpiece forged from your creativity. With every layered detail, you’ve crafted more than a bracelet—you’ve created a wearable storybook, a steampunk dream that dances with the steely heartbeat of adventure and imagination.
industrial hardware for jewelry
As an affiliate, we earn on qualifying purchases.
As an affiliate, we earn on qualifying purchases.
DIY steampunk bracelet supplies
As an affiliate, we earn on qualifying purchases.
As an affiliate, we earn on qualifying purchases.